How to Build Your Own Acoustic Panels (DIY)
Make Cheap, Easy, Attractive DIY Sound Absorption Wall Panels
Revised and updated May 01, 2021
Also Check out our Complete Guide to Home Theater Acoustics for more information, including where to place your acoustic panels.

Equipment List (per panel)
- (one) 2 ft. x 4 ft. x 2 in. fiberglass or rockwool absorption panel (click for examples)
- (two) 1 in. x 2 in. x 8 ft. wood furring strips
- wood glue
- (four) wood screws (#6 x 1-1/4″ flat head phillips)
- (two) 20-lb rated picture frame hangers
- (two) Heavy duty D-ring hangers w/ screws
- 62” length of fabric, minimum 36” width
- spray adhesive
Total Cost is about $20 per panel, or $2.50 per square foot.
Tools Required
Sound absorption panels trap acoustical energy (sound) and prevent it from reflecting off of the surfaces they cover. The panels are used to eliminate echoes and reflections that muddle or color amplified music and speech. These wall panels will also reduce reverberation levels in a room, which can sometimes provide ambient noise reduction.*
*Note that choral music, piano, orchestral instruments, group singing, and pipe organ benefit from reasonably reverberant acoustics, with many reflective surfaces. Installation of sound absorption material can harm musician performance and sound quality for these specific applications.
Suitable applications for sound absorption panels include:
- Improving surround-sound imaging and clarity for dvd/blu ray movies, sports, or video games in a home theater
- Reducing slap-back echo and reverberation in large halls, auditoriums, and contemporary churches
- Reducing chatter, din, and noise in crowded gathering spaces, restaurants, or bars
- Providing more accurate listening conditions in recording studios and control rooms
Note that sound absorption material is often called “soundproofing.” I believe that the term “soundproof” is usually misapplied, which will be discussed in another post. Sound absorption panels are NOT able to significantly reduce sound transmission through a wall between two adjacent spaces; they are intended to improve sound quality within the room that they are installed by attenuating sound reflections and reducing reverberation/decay times. If you are looking to reduce sound transmission through a wall, please see our directory of noise control products and solutions here: https://acousticsfreq.com/noise-control-products/
Commercially-manufactured sound absorption panels are available in two common varieties:
1) Molded melamine foam wedges and eggcrate (e.g. Auralex, Foam Panels
, etc.):

2) Decorative fabric-wrapped fiberglass panels (e.g. Golterman & Sabo, Wall Technology, Fabricmate, etc.):

The acoustic properties of each of these are very similar, with all of them absorbing approximately 100% of incident sound energy at mid and upper frequency ranges. Feel free to compare Sabine absorption coefficients at your leisure. These material types are mostly differentiated by their visual appearance.
An important consideration for any sound absorption panel, though, is thickness. A thicker panel will more effectively absorb a longer wavelength (lower frequency) of sound. Therefore, when choosing an acoustical material, consider the frequency content (tonal spectrum) of sound that you seek to absorb. For placement on drywall surfaces, the following rules of thumb should be helpful:
– For human voices, crowds of people, and speech use 1” absorber thickness
– For amplified music with bass and drums or cinema surround-sound use 2” absorber thickness (or greater)
The necessary quantity and placement of sound absorption material for a given space is determined by the specific type of listening functions occurring there. Extreme ends of the spectrum range from traditional/classical worship spaces which are entirely hard-surfaced (great for pipe organ and choral music) to THX-certified cinemas and movie theaters which have sound-absorbing materials on all wall, floor, and ceiling surfaces.
Consider which wall and ceiling reflections need to be eliminated and cover those entire areas with sound absorption treatment.
Pricing for manufactured, two-inch thick, fabric-wrapped fiberglass sound absorption panels is usually $6 to $8 per square foot. I have seen sound absorption panels priced as high as $12.25 per square foot! Given the large square foot area that needs to be covered to achieve a suitable home theater acoustic, this falls well outside of the average consumer’s budget.
I may annoy a few people by telling you this, but you can make your own sound absorption panels for MUCH less. What follows are explanations, instructions, and specifications for very effective sound absorption panels.
The essential elements of a sound absorption panel include:
Step 1: Select a sound-absorbing core material
The sound absorbing core material must have the following characteristics:
- Dense fiberglass or mineral fiber board insulation (not loose batt)
- Unfaced
- 3lb to 8lb per cubic foot density (6-8 pcf is optimal)
- 2” thickness
Three acceptable material options include:
Owens Corning Fiberglas 705 6lb pcf, 2″ thick: ~ $3.00 per square foot.
ROCKWOOL/ROXUL Rockboard 80, 8lb pcf, 2″ thick: ~ $1.00 per square foot.
Johns Manville Inusul-Shield 600 2″ UNfaced 6lb pcf, 2″ thick: ~ $3.00 per square foot.
*Note: Insulation prices can vary greatly depending on your supplier and location, so check into all three or other equivalent 3.0-8.0 lb fiberglass or mineral fiber insulation board products.
**Also Note: Fiberglass and mineral fiber insulation are known irritants. Please wear a mask, gloves, and glasses when handling the insulation. Follow the manufactures guidelines for safe usage.
You can usually find the best prices for these insulation products at your local insulation supply dealer.
Click to find dealer locators for: Johns Manville – Owens Corning – ROCKWOOL

My prototype panels were built with the Roxul RHT 80 insulation, which is the least expensive sound absorption material that I have found. The Roxul acoustical performance is similar to the Owens Corning and Johns Manville products, but it is softer and has a less regular shape. The manufacturer-supplied sound absorption coefficients are as follows:
2″ Roxul RHT 80 2” Owens Corning 705 2” Johns Manville 817
125 Hz = 0.39 125 Hz = 0.16 125 Hz = 0.38
250 Hz = 0.84 250 Hz = 0.71 250 Hz = 0.93
500 Hz = 1.08 500 Hz = 1.02 500 Hz = 1.10
1000 Hz = 1.01 1000 Hz = 1.01 1000 Hz = 1.07
2000 Hz = 1.02 2000 Hz = 0.99 2000 Hz = 1.07
4000 Hz = 1.01 4000 Hz = 0.99 4000 Hz = 1.07
Sabine absorption coefficients are roughly the ratio of reflected sound absorbed. So, at a given frequency range, a 1.00 coefficient equals a 100% absorption rate* (0.71 equals 71%, etc)*. Note that these figures are provided by the individual manufacturers and tested in different labs. It is safe to assume that each of these materials is equivalent to the others.
*Edit: Sabine absorption coefficients are not a true energy absorption coefficient and can exceed 1.00. Therefore the translation into % absorption of reflected sound energy is not quite accurate from a physics perspective. However, for the purposes of acoustical design in architecture it is a good way to understand and compare different materials.
Step 2: Build a wood frame around each panel
- For each panel frame, cut two segments of furring strip to 49-3/8” and two segments to 24” (check measurements with your sound insulation panel and furring dimensions). Measure and cut to ensure a snug fit around the insulation.
- Apply a heavy dose of spray adhesive to entire perimeter of insulation (NOT THE FRONT FACE). (glue will hold the insulation in position within the frame).
- Position the insulation such that the bottom face of the panel is flat and level with the wood frame.
- Arrange wood segments around the fiberglass panel. You will want the frame to secure tightly around the insulation, compressing it slightly.
- For each corner:
- Pre-drill a pilot hole for one corner to ensure alignment and prevent the wood from splitting.
- Apply wood glue.
- Screw wood segments together.
- Allow 24 hours for wood glue and spray adhesive to dry.


Step 3: Select a sound-transparent fabric; wrap the panel

The most common fabric choice for commercial panel manufacturers is Guilford of Maine Panel Textiles. This is a high-quality material. That being said, there are a great variety of inexpensive fabrics that can work equally well. Colored burlap is a very common choice. My prototype panels use a Keepsake Calico paisley material purchased from a local fabric store. Considerations for your fabric cover:
- Must be “breathable” and sound-transparent
- Ensure that your fiberglass panel is not visible through the fabric
- Beware that fabric with visual patterns will be tricky to line up squarely when stretched over the wood frame
To stretch the fabric to your panel:
- Lay a 62” length of fabric (face down) on the floor.
- Place your framed panel on top of the fabric with the flat/level/even side facing up.
- Have a friend wrap the fabric around the backside of the panel and staple it to the wood frame every 3” along one of the edges.
- Stretch the fabric tightly along the opposite edge and staple, continuing along the panel edge at 3” intervals.
- Repeat steps 3 and 4 for the top and bottom edges, taking care to neatly fold each corner.
- Apply spray adhesive underneath the remaining loose fabric areas on the back side of the panel.


NOTE: Apply spray adhesive to BACK side only, NOT front face.

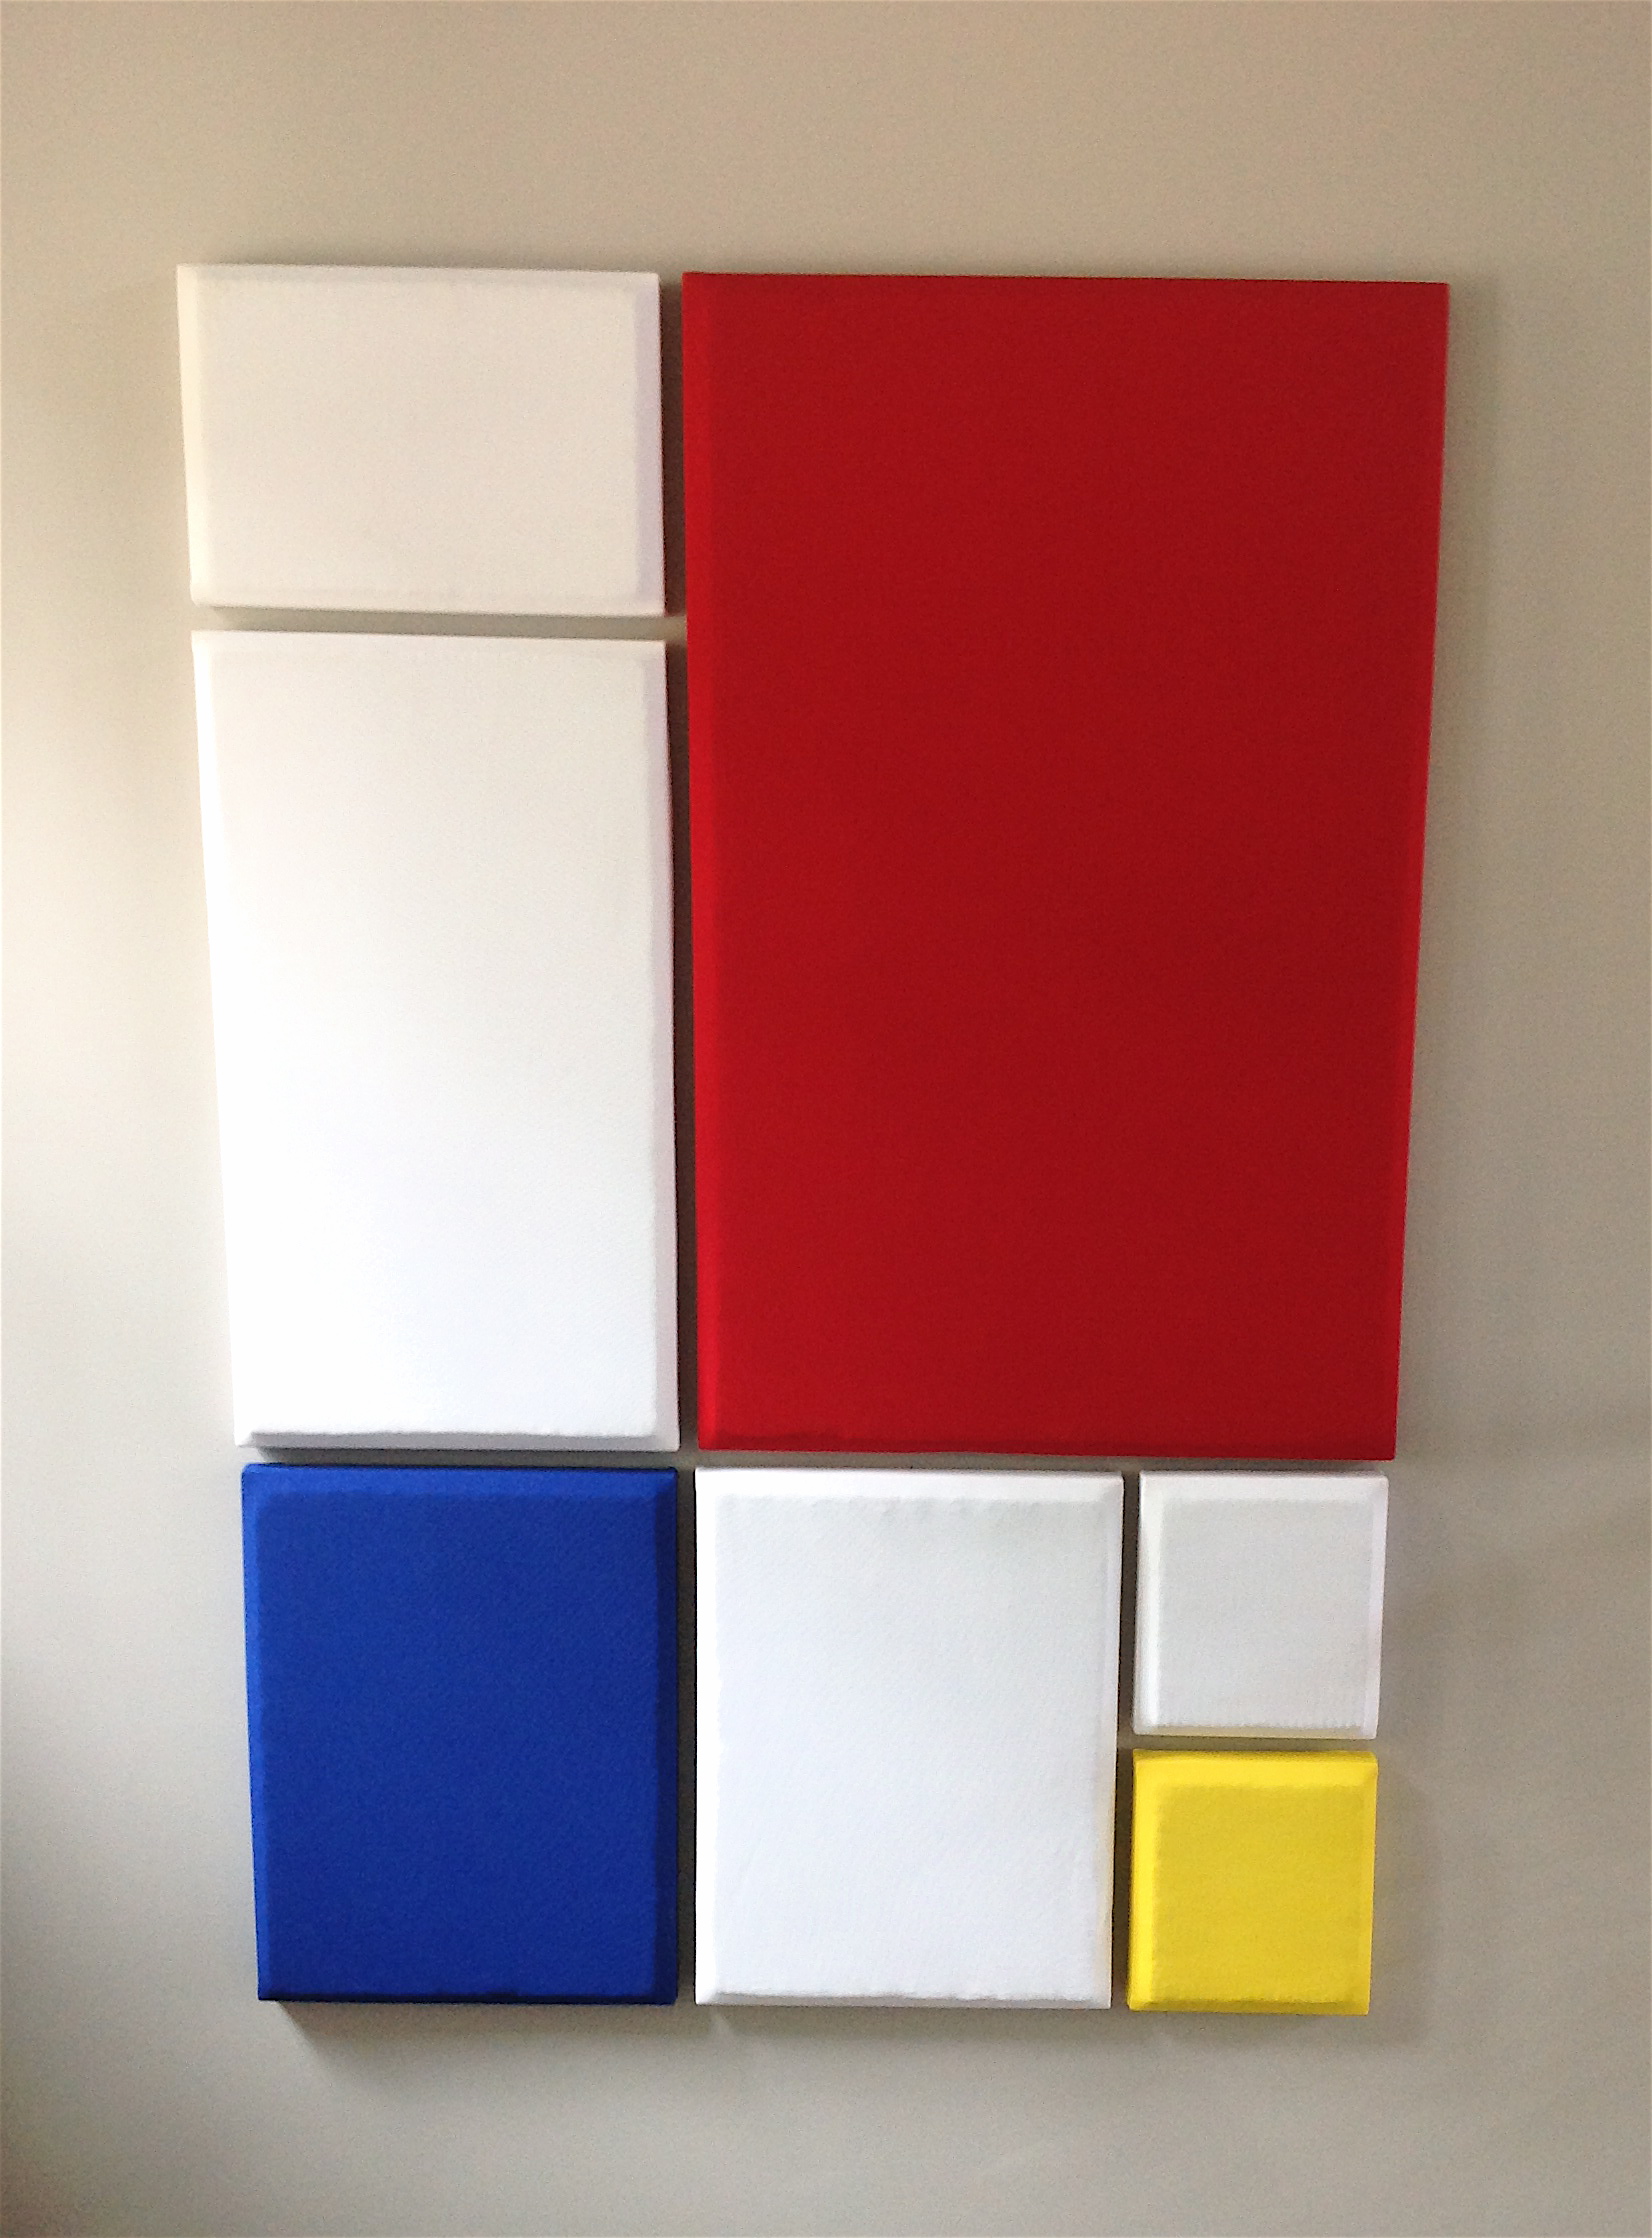
Panel Back

Panel Front
Step 4: Mount the panel to your wall or ceiling
Detailed steps for finding the best placement locations for sound absorption panels in a home theater can be found in our detailed article: Where to Place Sound Absorption Panels in a Home Theater. Note: Adding a small airspace (1.0 to 2.0 inches) behind the panel will significantly improve low frequency sound absorption performance.
These panels can be mounted similarly to a heavy piece of artwork. Use your discretion and judgement to make sure that your panel is safe, secure, and stable. I screwed two heavy-duty D-Ring hangers on each side of the wood frame, measured to exact spacing. These were hung on two 20-lb rated picture hangers. See the Equipment List below for hardware recommendations.

Step 5: Listen
Now you are ready to enjoy your music or home theater the way that it was intended. Most people are surprised to hear what music and movies sound like in a properly-treated acoustic environment. The audible difference cannot be overstated; it is like night and day.
")
")
June 4, 2014 update:
Here are some photos from a recent build by our reader Mike:


[…] Wolfram] wrote in to let us know about a simple and cheap acoustic panel DIY he put together. When installing a home theater acoustics are often neglected (especially if […]
Great Build! I did the exact same thing in my home studio several years ago. I went with the Owens-Corning and used jute burlap coffee sacks as my fabric (super breathable fabric). Turned out really nice, and way cheaper than the foam.
If I build anymore I’ll go with the much cheaper Roxul…
[…] at AcousticsFreq they have put together a great guide on how to build your own sound absorption panels. Now, you […]
[…] How to Build Your Own Acoustical Panels [AcousticsFREQ via Red Ferret] audioacousticsdiy Discuss Share Tweet Email More get_count_post('http://www.lifehacker.com.au/2011/11/make-a-diy-sound-absorption-acoustical-panel/','post-405882'); « Previous post […]
[…] How to Build Your Own Acoustical Panels | AcousticsFREQ via Red Ferret […]
[…] How to Build Your Own Acoustical Panels | AcousticsFREQ via Red Ferret […]
[…] and sound blog Acoustics FREQ shows us how it’s done. The bottom of this row is a sound-absorbing core element that’s […]
[…] which looks very pretty (shared by Megan Christensen), and a fellow blogger who has posted on how to make your own acoustic panels (shared by Andrew Hathaway). One other item of interest to our group is that Omaha recently […]
[…] pretty much it. I realized that this wasn’t particularly novel when I realized that this guy did almost the same thing independently, but I think the coffee sacks were a nice […]
Great website. A lot of helpful info here. I?m sending it to several pals ans additionally sharing in delicious. And obviously, thank you for your sweat!
What if the fabric should ever need to be changed? Would the glued portion of fabric being removed destroy the panel back?
Could the fabric be trimmed away from the frame (leaving the old fabric glued to the back of the panel) and new fabric applied over the back? Would this secondary layer adversely affect the efficacy of the panel itself?
Good point! You actually don’t NEED to glue the fabric at all. I did it to make the thing look more finished and neat. If you wanted to change the fabric eventually, I would suggest cutting off the excess and not gluing it down. Then you could just pull out the staples and re-wrap.
Sticky back Velcro is quite good. We used to use that in soft furnishings fixings blinds to wooden rods etc.
Wonderful article! I’ve seen several DIY articles on this topic, and this is BY FAR the best!
The article suggests several times that many panels are needed, but it’s worth pointing out that in many rooms, a significant improvement can be had by simply putting one panel on each side where the primary reflection of each speaker occurs on the way to the listening spot. Second would probably be the reflection off the wall behind the speakers. Many pros I know also like to have a bookshelf behind the listening spot, with books and other knickknacks added randomly to diffuse the rear reflection (maybe with some absorption).
No doubt you realize this, but the article might make some think the goal is to cover walls extensively. 2-6 panels would probably double or triple the quality of most listening rooms. I’ve also read somewhere that having about 25% of a room surface absorptive is ideal for conversational clarity. So, wanted to add these two cents into the mix.
@ matt
“I’ve also read somewhere that having about 25% of a room surface absorptive is ideal for conversational clarity”
yup,
this company in Aus think its about 35%. http://www.cmfacoustics.com.au
Hypotheically, if I used many of these, would it dampen incoming sound from my neighbors apartment, and baffle outgoing sound ?
Sound absorption materials (like these panels) are useful in eliminating reflected energy within a space.. so, they can absorb echoes, reverberation, sound reflections, etc. However, they are not an effective barrier to prevent sound from transmitting to an adjacent space. You will need to improve the Sound Transmission Class (STC) performance of your wall assembly. That’s a tricky task, that usually requires a construction project. I recommend hiring an independant Noise Control consultant to help you. Check out http://www.ncac.com for options.
Aaron,
This sound barrier blanket may give you a few decibels improvement, if you cover 100% of the common wall surface, leaving no gaps and seams. However, it might not be cost effective for the small improvement you will gain. Sorry to say, but you are not going to get a worthwhile improvement without modifying the wall assembly.
If the noise is affecting your sleep, consider using some soft ear plugs (Howard Leight MAX1 Earplugs Uncorded NRR33 Box/200 Count )
)
…or try running some pink-noise masking. Check out simplynoise.com
Eric, thank you for your quick reply! Unfortunately I am renting, and doubt construction is possible for me. I just recently moved from an apartment because of bass from the tenant below me, now I am hear voices from the neighbors, which is slightly more bearable. Any suggestions for that? I am thinking about trying out Audimute Sound Absoprtions sheets.
http://www.audimutesoundproofing.com/Audimute-sound-reduction-curtain-noise-proof-your-band-room-soundproofing-existing-walls.aspx
Yes, realize that living in an apartment you will have neighbours and learn to live/cope with the sound while realizing that they are also forced to live/cope with your noise.
Eric, is there a specific reason as to why you chose Roxul RHT 80? Did you consider the Safe ‘n’ Sound product from Roxul? http://www.roxul.com/residential/create+a+quiet+home+with+safe%E2%80%99n%E2%80%99sound I’m just wondering if you were familiar at all with the Safe ‘n’ Sound, and if you considered the RHT 80 a better product for sound absorption. Thanks.
Jim,
That product is a batt insulation for installation within a wall cavity. It will help improve the sound transmission loss of the wall, but does not absorb reflections off of the drywall surface. The Safe N’ Sound material does have excellent sound absorption performance, but is not firm enough to be ideal for a wall-panel installation. The RHT 80, or equivalent products,are what you want for the DIY sound absorption wall panel construction.
I am confused. Does this make a difference if you were making acoustic panels or is this product only efficient when it is in a wall. cause i just made 10 panels with the safe n sound last night :/
The article describes all of requirements for the insulation used within the panels. 3-7pcf unfaced insulation board is best. Less dense insulation will work, but will be less effective at lower frequencies. However, you can make up for this with more thickness from the batt insulation. So, you may be ok.
Sounds good, Eric; thanks for the quick reply.
I am building similar absorbers from your guide using 4″ rigid fiberglass in 4′ x 8′ frames for my home and studio. However, it is the neighbor above me that is sometimes bothered by the transmission of sounds going up through the ceiling. Between the floors is about half a foot or a foot of space I assume. Will it make a significant difference and is it possible to fill the space between the joists with loose fiberglass batting using a machine?
Using a 4″ core material in your panels will improve the low-frequency absorption characteristics, but is not always practical for everyone. That’s why I used the 2″ core for the article. If your floor/ceiling cavity is currently empty (no insulation), then adding a thick batt insulation will make a noticeable improvement. It may not get you all the way there, but will be noticeable and worthwhile. There are lots of blow-in insulation options out there (search google). Make sure you use something that does not harden or become rigid. You want the equivalent of loose batt insulation in the cavity to eliminate resonance.
I am looking to reduce the terrible echo in my kitchen and your DIY panels look like a good option. This may be kind of a silly question, but how did you hang your panels from the ceiling?
Also, not knowing much about acoustics, if I just want to reduce echo from people talking (and children screaming =) ) are there optimal places to put the panels, or would I just want to cover as much of the hard walls/ceiling as possible?
John, I used D clips and the screw-in hooks, but you’ll want to use your best judgement. Check out the picture frame mounting stuff at the hardware store, it’s really no different than hanging a large piece of art. Also, it doesn’t have to be perfectly flat to the wall or ceiling. The sound absorption properties actually improve if you leave a little space. I just posted a new article that may give you some ideas about how to find the best placement location. Check it out here: http://acousticsfreq.com/blog/?p=432
[…] and best investment for improving the overall quality of the sound . How to Build Your Own Acoustic Panels (DIY) | AcousticsFREQ.com The panel in the middle is in front of my seldom used flat screen. Please excuse the messy wires […]
Eric, are the acoustic properties for these panels bi-directional? I’d like to make one for my home office in the basement and hang it on the inside of the door leading down to reduce noise from the upstairs (my kids!). Also, any recommendations for this project such as a door sweep (that will not mar vinyl flooring with repeated use) and “weather” striping? Many thanks!
Luke,
Unfortunately, this sound absorption panel will not significantly improve the sound transmission class (STC) of that door. These panels will improve sound quality by absorbing unwanted acoustic reflections, but do not act as a barrier for sound transmission. I would instead look at treating the door itself. At some point, I plan to do a little series on this site about noise control because it is a very common question. In the meantime, here are a few pointers:
1) Start with a thick, heavy solid core wood door (not hollow core)
2) Use a neoprene bulb compression seal around the perimeter (sides and top) http://www.ngpinc.com/product_view.cfm?nProduct_ID=42
3) Use an exterior grade threshold seal or automatic door bottom at the base of the door.
It is important to maximize the mass of the door and the quality of the seals. Make sure you achieve an airtight seal to the door frame.
If you wish to achieve even more isolation, you could add a second door (treated as above) on the other end of the stairwell.
I hope this helps!
Eric, many thanks. “Mitigation over time” is probably a better description of the approach I’m willing to take (read: minimum $). So would I be right to assume that I will get the most improvement as a function of area (ie, door mass, then threshold seal then perimeter seal)?
Secondarily, the door opens to the stairwell (wood stairs with sheet rock walls and ceiling) leading down to the basement floor landing. So the stairwell seems channel sound coming through the door, reflect off the sheet rock basement wall at the bottom landing and into the basement. The stairs will ultimately be carpeted. Would this panel be of any significant benefit on the basement wall at the bottom of the landing (perpendicular to the door)?
Luke, complete door treatment (as described above) should be your first priority. Adding sound absorption material to the intermediate space (carpet, wall panels, etc.) will provide some additional improvement as well, but not as significant of a change.
Eric, much appreciated!
Thank for a very well done set of instructions! I have been without acoustic anti echo treatment since 1994. My wife hated my cardboard egg crates. I now have a 20ft x 20ft theater room since 2006 and the echo is killing me. The wife and daughter do not notice it.
The cost to do this has stopped me every time. I was hoping the price would drop on this stuff but every time I check it is still too costly.
I have thought about doing it my self but I was stuck on foam. Fiberglass is a very good material to use thank you. Joe Williams
Hello, I’m looking for Roxul RHT 80 in my area of Los Angeles, CA. I went to the Roxul RHT 80 website and got the local distributors. I called them all and they don’t even know what I’m talking about. Did the name change? is it no longer RHT 80? Do anybody know where I can get some Roxul RHT 80 or equal alternatives?
Anthony,
I contacted Roxul customer service and they gave me these dealers who have purchased Roxul RHT80 it in the past. They may have it in stock or can order it for you.
CWCI Insulation
City of Industry, CA 91745
626-369-4424
Pacific Insulation
Benicia, CA 94510
707-741-2963
If anyone else has trouble finding the product, try calling Roxul Customer Service at 1-800-265-6878.
Thanks man I’ve been searching all over for the last 3 days. I have a question though is this RHT 80 on this website
http://www.atsacoustics.com/roxul-rockboard-80.html
I am having difficult time to find RHT 80. I heard that cork is also an excellent sound absorb er. Do you think natural cork sheet can give good result?
Vijay,
If you can’t find any of the three products listed in my article, then look for an equivalent 3lb/sq ft to 8lb/sq ft density rigid fiberglass insulation board.
Excellent. Just what I needed for my home cinema (buying finished acoustic panels are quite expensive here, so I’ll definitely go the DIY way)
Thanks a lot for the guide,
Peter
Hi and thanks for the info. I am a Kindergarten Teacher and am looking to absorb sound in my very echo-y classroom. I live in Canada and was wondering what material I could use that is available here? Thanks for your website!
Bexter
Bexter,
Roxul is actually a Canadian company, so I would guess that you should have no problem obtaining the RHT80 or a similar product over there: http://www.roxul.com/
Would the home “comfortboard IS” from Roxul be a suitable alternative? I can get it in 1.5″ thicknesses. The other options listed just are not locally available to me. Looking at the accoustic values on the spec sheets it would appear to be close. Thanks.
Yes, it looks like that would be a suitable alternative. Check to see if you can get the 2″ thickness or consider using 2 layers of 1.5″. The thickness is important for improving low frequency absorption.
Hi, i have a question. Im using the metric system, and the density you mentioned is a little bit confusing for me, shouldnt it be cubic foot? How important is the density of the material? Because in my country Ive found many suitable materials, mainly I was looking for insulation(mineral and fiberglass) with better acoustic properties (average sound absorption coefficient 0.90 – 0.95 in band 125 -4000 Hz).
Lahino, Absorption coefficients are more important than material density. If you have an insulation material that has been tested and performs well, then use that. Note that performance down to 63 Hz is important to consider.
[…] How to Build Your Own Acoustic Panels is written from a home theatre perspective. Use their detailed instructions to create panels for your sound effects studio. […]
Thanks for the great article! It’s inspired me to build some panels. My local insulation supplier here in Maryland is AC&R and they carry Knauf Insulation Board (http://www.knaufinsulation.us/products/commercial__industrial/air_handling_insulation/insulation_board_with_ecose.aspx), which at 2″ thick and 6.0 PCF looks to have pretty good sound absorption coefficients.
How bad would the sound absorption of these panels be if they were covered with a very thin plastic film? I’m thinking of doing that to contain any dust fibers and make them safer to be around.
Any thoughts?
Jack,
The US government has excluded mineral fibre from its list of carcinogenic materials. Which is good because the stuff is used in many different ways in commercial and residential construction, including as HVAC liner material. Mineral fibre dust is only a concern in high quantities, such as for people who work with the material. So, you should wear gloves and a mask when you are handling or cutting the insulation to avoid irritation from breathing in high concentrations of dust. More info on health issues with mineral fibre: http://www.roxul.com/stone+wool/health+and+safety Also, I have never seen any evidence of fiber dust coming from my fabric wrapped panels.
Encapsulated insulation will have a reduced absorption rate at higher frequencies, so if you wish to go that route I would find a material that is acoustically tested with encapsulation.
Starting my DIY build of these panels on monday, my question concerns the material. Did the Keepsake Calico work out or was it to heavy? My problem is the right material I did research yours and its 100% cotton, so in theroy if I stay with the guidlines of that material I should be ok, provided yours did work out. As you stated “Prototype” so curious if the material changed or ???
Yes the fabric shown in the article worked out great. There are lot of different options for this, however. Anything that is fairly “breathable” should work well.
I wish I knew someone in Washington who I could pay to do this kind of stuff. I am useless at this sort of craft and it looks like I’m about to spend a bucketload to drown out the family of wild animals living in the unit above me.
We are considering using duck canvas which is very durable like denim but you can still see light through the fabric. We were thinking the durability may be needed because the walls we are covering are in a gymnasium in a family center for our church. They will be up high but the possibility of a basketball or volley ball hitting them makes us worried about using burlap or a light weight fabric.
Also is Roxul’s AFB the same as the RHT-80?
Darla,
I would suggest using one of the acoustical core materials described in the article or something with equivalent sound absorption coefficient ratings.
The canvas cover should be acceptable as long as it is breathable and permeable (i.e. not “backed”), see the fabric section of the article.
Regarding the frame, please follow the instructions for construction and mounting in the article. This is the easiest, least expensive, most effective way I have found to make these panels. Remember: if you deviate from the recipe, you can’t expect the dish to come out as intended! I hope this is helpful. -Eric
I guess I forgot to ask the question if you thought the thickness of the duck canvas might cause poor performance for the panel?
Also, we are thinking about just hanging this stuff by screwing through it to the wall so we don’t need to build the wood frame…..is that a good idea?
Why or why not?
We have never seen or felt this material. We have no idea how rigid it is? Would screws or staples through the material mess up its sound absorption qualities?
We just have no idea what it looks like or just how rigid it is, but we are hoping we can do this without a wood frame.
Any ideas or info you have for us would be greatly appreciated.
Thanks for this tutorial.. About to build my own Aborbers.
Amazon has some Roxul products but not the RHT 80.
http://www.amazon.com/Roxul-Rockboard-Mineral-Wool-Board/dp/B006C10IR6
It seems like they are identical though but different names. The “Rockboard 80” also has a density of 8 Pounds per Cubic Foot.
Eric, do you know what the main differences are? Seems like this product will do the same job.
Carlos,
I think these may be the same panels, but resold from another company. The price is actually similar to what I paid from a local insulation supplier. SO, I would say go ahead with these! Thanks for the tip.
I’m currently in the process of buying a home and plan to make one of the bedrooms my music room. The room has two windows, which I plan to cover with these DIY panels. But I also am curious as to where or how man panels I should have in addition to this in order to enhance my music recording, which involves acoustic drums, vocals, and amplified guitars. Is there some method or general idea to follow in order to achieve better quality recordings?
I love these DIY panels because I have a good feeling I can make the room both aesthetically pleasing while reducing annoying background sounds in my recordings.
Casey,
The techniques shown in my article “Where to place acoustic treatment in a home theater” will apply to your recording studio project as well. However, you’ll be substituting the instrument locations as the source point and the microphone locations as the receiver position. I would also recommend getting THIS BOOK for a very good overview of architectural acoustics and recording studio design techniques. I hope this helps, Good Luck!
As these panel effectively consist of a wooden frame with insulation in between, when they are used as ceiling panels won’t they tend to sag after a period?
Peter,
Thanks for asking. No, it will not sag if you follow my instructions. I have recommended a rigid mineral fiber insulation board as the acoustical core, which will hold its shape. If you use a standard fiberglass batt insulation, then yes, it would sag.
-Eric
Great article!
I’m about to start my first panel, but I’m having trouble getting any of the insulation materials here in south Florida at a reasonable cost. For example 1 panel with shipping is almost $30, 6 panels of the RHT 80 is $100 after shipping. I can’t find a supplier in my area. I went to Home Depot and picked up 3 5/8″ 2’x4′ acoustic ceiling tiles. Using all 3 panels would give me a thickness of 1-7/8″. Do you think that would provide comparable absorption coefficients?
Jeff,
I think your plan should work as long as the tiles are high performance (high NRC) and not backed by foil or any other non-permeable material. You could also add a little airspace behind to improve the low frequency absorption rates. How much did that cost compared with the rigid insulation?
-Eric
Eric,
I bought the USG Ceilings Fifth Avenue 2 ft. x 4 ft. Lay-In Ceiling Tile (3-Pack) from Home Depot. It was $18.52 for all three panels. The panels are made of Fiberboard material. The NRC is 55, but since I’m using three panels would it be higher than that? The price is pretty comparable to the six pack of RHT 80 ($115 for 6), but this way I can build one at a time – I probably only need 3 panels in my room, maybe 4 at the most – so the rest would be wasted. Do you think the RHT 80 would be that much better and worth it? How did you get your RHT 80 for $6.60 / panel?
Jeff,
Well, it depends whether the NRC performance of those tiles is limited by its thickness, or surface reflection. That could be something for me to try to test in my quest to find the cheapest DIY absorption panel possible. The price I list in the article is what I purchased the originals for from Allied Insulation in Milwaukee. If you contact Roxul’s support line, they can probably find you a wholesale retailer in your area.
FYI: Updated Roxul customer service phone number: 855-876-3755
Ok, thanks!
[…] might be of interest to anyone who wants to make their gun quieter: http://acousticsfreq.com/blog/?p=62 Anyone know of a good circuit simulator? Gandolf probably eliminated all other possible designs, […]
This is a great DIY article and I definitely plan on making a few of these for my office! I am not far from the Milwaukee area so would be willing to drive to save on the ridiculous shipping that other places are charging to order these. Do you have a part number that you used with Allied when you contacted them?
It was Roxul RHT 80
First off, great article! Exactly what I was looking for.
I am a photographer and have lots of stretched canvas photos in my apartment. If I have deep enough frames, can I insert the Material behind stretched canvas with ink and get enough acoustic transparency? I would love to be able to make the photography functional as well as decorative. Thoughts?
Jon,
That is an interesting question. Is the stretched canvas very permeable? Could you easily breath through it if you held it up to your mouth? This will determine whether it will be acoustically transparent or reflective at high frequencies. There are companies that market a “photo faced” acoustical panel, but they do a lot of R&D to make sure the cover allows sound to pass through into the sound absorptive core. Check this out: http://www.gsacoustics.com/acousti-image.aspx
Very cool! Thanks for the information. I’ll try to breathe through the canvas and see hoe permeable it is. I am guessing hat darker pictures with more ink may be more problematic, but I’ll give it a try when no one is looking. :). Thanks for the quick feedback!
Hey Jon, I’ve made these for a number of restaurants and I’m currently building some for a motion therapy gym. They do work great. The problem I’ve encountered in these situations is that these kinds of spaces typically have large areas of glass at the street side of the space. Any thoughts?
Nick,
It will be hard to absorb sound reflections from a glass surface without affecting the view through the window. Plush draperies can help. There are also some micro-perforated clear acrylic sound absorption materials on the market. See here: http://en.wikipedia.org/wiki/Micro_perforated_plate
-Eric
Thanks for getting back so quickly, I’ll look into that. My client is asking about B.A.C. Panels. How do you feel they compare to your system?
Can the solid insulation you recommend be cut safely into different shape like circles and diamonds?
Yes, mineralfiber/fiberglass is safe, but it is an irritant so make sure you wear gloves and a mask. Cut it outside if you can to minimize the dust fibers in your house. -Eric
Great Post. Where did you find the Roxul Rockboard 80 for $6.60 per panel? The Amazon.com link is $12 per panel (plus shipping it is $18). Thanks.
Paul,
In the article I give a link for finding local insulation suppliers for Roxul, OC and Johns Mannville. If you buy from one of these distributors, the price should be lower. Also, in some areas Owens Corning 703 may be less expensive than the Roxul. You are looking for a local insulation supply warehouse.
I was able to purchase Roxul for $6 per panel in the Chicago area at an authorized dealer. I have to drive a little to pick them up, but nothing terrible.
I purchased black burlap for my fabric, from JoAnn fabric but I am concerned it will show through. I got it for 20% off so I thought it was worth a try. About $6 per panel.
Took me 20 minutes to find enough straight wood at home depot to build 6 panels. But paid about $1.74 per panel. Because I was concerned about the wood showing through, I spray painted the wood flat black. Another $1 per panel.
So without screws, hanging hardware and glue (which I have), I am at ~$15 per panel.
I was thinking about miter cutting the corners on the wood for a cleaner fit. May not be worth the hassle since they are going to be covered.
Thanks for the tutorial.
I’m going to place an order for RHT80. The Roxul site shows RHT80 in a rigid form and in a flex form. Which form was used for the build? Thanks! The band can’t wait to build these and move into our bigger room! -Paul
I just finished building a set of these, if you’re a person who doesn’t feel like they have a lot of skill in completing projects like this (i am one.), lemme tell you, it is super easy to do, mine turned out great. I ended up using Roxul Safe N’ Sound after doing some research, and you can get 12 3″ batts for $42 which is a great deal, this was easily available at most of the Home Depots in my area, so no tough hunting. if you use 2″ strips of wood for the frames, each frame costs about $5 or $6, and then it’s just making a fabric choice and making sure you have the other supplies entailed.
I recommend the Safe N’ Sound for your material as it is specifically made for sound/fire insulation. Thanks for the tutorial!
Josh,
Thanks for the kind words! Send me pics and I’ll add them to the article.
I’m working on panels for a restaurant with low ceilings. The cover fabric needs to meet fire codes and scrubbable. I’d like to use a marine/automotive vinyl for those reasons. How much sound absorption will I be sacrificing? I tried the “breathe test” and it hardly moves. Thanks!
Nancy,
I am sorry to say that if the fabric is not permeable, then it will be somewhat sound reflective, especially at higher frequencies. There are products available that are washable though. Take a look at this: http://www.ecophon.com/en/Product-Web/Hygiene/Hygiene-Advance-Wall-C3/
Thanks for the inspiration. I made three panels. Two are the ‘standard’ 24×48 that you did here in this article, and I made a large one that is 55×89. The large one is behind our sofa with LaserDiscs framed and hung on it. I did it that way for aesthetic reasons. You can see how they turned out here: http://www.livgeek.com/blog/2013/11/22/diy-building-acoustic-treatments
Again, thanks for such a detailed article.
Hey. Just wanted to say thanks for the awesome guide! I just built 6 of these for my home studio, and they’re working great! I’ll probably need to do another 6 but this is a huge step in the right direction. I couldn’t get any of the insulation types you recommended – at least not for a reasonable price, but what I discovered was that Roxul Comfortboard IS has nearly identical absorption coefficients at 3″ thickness as the Rockboard 80 at the same thickness, and is much more widely available. I used 2 x 1 1/2″ boards per panel, and I’m very pleased with the results, for a fraction of te cost of buying pre made panels. Thanks again for all the info!
I noticed that many comments were about noise intrusions from neighbors above and next door. Anyone who is doing remodeling should use a trick I have used for years. I insulate ALL walls, interior as well as the usual exterior. I also try not to build “square” rooms. If I have a little latitude, I use non-90 degree corners, helps prevent “ringing” like when you clap your hands.
The interesting thing about the in-wall insulation is that it improves the acoustic qualities of the primary room as well as keeping the leakage of sound in or out.
Very good article, by the way.
Hi,
Just read your article. We have a dog care Center and need to cover the feeding kennels. Would dogs barking be in the high frequency or the low? I m wondering what thickness to use…thanks
Linda,
You may want to use 2″ panels. Larger dogs will have a relatively low fundamental frequency to their voice. Note that sound absorption treatments like these panels are good for reducing reverberant energy and echo within a room, not for acting as a barrier between rooms.
-Eric
Is it really necessary to use spray glue? wouldn’t the fabric keep the panel in place?
William,
You are right, it is probably not necessary. However, I thought it helped keep everything together better. With the glue, there was no movement of the insulation within the panel or of the fabric on the back. Use you judgement and do what works best for you.
-Eric
Will this also work to absorb sound from employees on the phone, in a large room? The desks face the wall and gets noisy for other employees.
William,
Yes, that could be a possible application. If you have a large wall that is reflecting noise, absorption panels can eliminate that reflection and help reduce the perceived loudness of “chatter”.
-Eric
Hello. Thank you very much for the fantastic article, as well as the other story on actual panel placement. I have converted a hobby room into a listening room. The room size is 9′ x 11′ approximately and is all gypsum and hardwood floor. I started up my sound system in it yesterday and the echo and reverb are out of this world. I’ll be making your panels this week!
I did some research and it seems that the panels that you recommend (RHT80) are now SL900 boards (http://www.roxul.com/products/industrial/sl+900+boards+and++slabs+(thermal+applications)). I’ve looked at various places where they say they are distributors and no one carries these. I wanted to use the Safe’nSound boards but this was discouraged further up. Would you have comments about the ComfortBoard IS? I can find these.
Last question, I saw in your blog a picture of someone with multiple smaller boards put together. I liked that look. Will this have an impact on the sound absorption or will they effectively act as one big panel?
Thank you for all your help.
Bertrand
Bertrand,
Yes, Roxul seems to have changed their marketing name for the product. I believe that now it is called “Rockboard 80” or something like that. You can use an equivalent board as long as the absorption coefficients are similar across the spectrum. The Comfortboard IS seems to be good too. I have also heard that in some areas the Owens Corning products or Johns Manville products are cheaper, so try those too. There is bound to be an insulation supply warehouse in your area and I am sure they have a good deal on at least one of the recommended products.
There is no problem with butting smaller tiles together to make a nice design. Sound absorption is all about surface area covered, the size of individual pieces do not matter much.
Send me photos when you are done and I will post them to the site!
FYI – even though Home Depot don’t have it on their site or in their pro desk Roxul catalog, they are capable of ordering Roxul Rockboard 80 for $70 per pack (6 sheets per pack). Someone at the pro desk has to call their distributor to get it. not at all a difficult process, but sometimes only a manager at the pro desk knows how to do this.
The caveat is that it can take 2-4 weeks because US distributors don’t stock it, so it comes from Canada and they wait until they have a truckload of product to include it on, at which point it gets in HD’s hands and ships to the store for free. This is not a solution for quick delivery, but beats the heck out of $30+ shipping per pack that I’ve seen at most online vendors.
Added bonus – Home Depot’s frequently available 10% of coupons work for this, dropping the price to around $63 plus tax.
I purchased several packs today (8/28), looking forward to trying this design out! Thanks for all the great info!
MW,
Thanks, this is very helpful! By far the most common question I get is how to find the insulation panels. I always recommend a local insulation supply warehouse, but it is good to know that Home Depot is an option too! Send me some photos when you are finished and I will add them to the article.
-Eric
Thanks for the great tutorial!
Roxul RHT 80 is now named Roxul ProRox SL 960
(See http://www.roxul.com/files/RX-NA_EN/pdf/Brochures%20and%20Sell%20Sheets/Industrial/ProRox%20Board%20Products%20Brochure_web%20version%2005202014.pdf)
Great article back in 2012 and your follow up has been fantastic. We have almost all the info we need to make our sound absorbing panels but still have one item left.
We are planning on hanging the finished artwork with sound absorbing materials behind the artwork, a small distance from the wall on standoffs or on cables away from the wall. Will these sound absorbing panels do the trick. We have long 12 foot high hallways and very echo laden break and kitchen areas and we need to quiet things down…a lot!
Also, have you had any material changes since 2012 that you’ve found work well?
EJ
Hi,
I live in a basement suit and share stairs going up with my upstairs neighbors, there is no door from my living room area to the stairs and I do podcasting/they have loud hockey game nights.
If I was to build one of these panels door size(or larger than the door like a door panel), would if cut down on the sound going back and forth?
Thanks for any help anyone can give!
Is that Dr. Caligari on the screen? a silent movie and an ironic choice for your illustration 😉
Great article btw, trying to get these built for my office
Roxul SL960 versus RHT80
I called Roxul. Their specifications engineer Abraham Sebastian returned my call (while he was on vacation, no less). The upshot is that they no longer publish ASTM acoustical co-efficients since a global rebranding of the name RHT80 to SL960 (I presume because the product is marketed for thermal applications), but he confirmed the product is “identical” save for the name. So nice to have a company that actually takes the time to put you in contact with someone who will answer your question. That alone makes me want to buy Roxul. The lower cost and similar or better performance when compared to Owens Corning and Johns Mansville is the other factor.
SL960 versus Rockboard 80
While the Rockboard is marketed for sound absorption, check the specs versus RHT80.
The Lowe’s here can find these products at a distributor, but being an “industrial product”, cannot order it into store, so go to the manufacturer’s website and get distributors directly from Roxul, OC or JM.
Excellent Comment Hans! I will make an update to the article soon with new product names and estimated costs. That’s odd that they wouldn’t publish the ASTM C423 sound absorption coefficients anymore, that is what most architectural acoustics designers use in most of the world (except for Europe)
I have worked with this stuff before, I am not so sure a frame is necessary. Just wrap it and hang it!
Amazing Tutorial. I saw some panels for sale here but they had plywood backing. Does this defeat the purpose?
Not necessarily. If the plywood is behind the insulation, with an airspace to the wall, then it can help provide improved low frequency absorption. This is sometimes called diaphragm absorption.
[…] just as well as the store bought versions. It’s really all about the foam you use. I found these great instructions on […]
[…] How to Build Your Own Acoustic Panels (DIY) – Also Check out our Complete Guide to Home Theater Acoustics for more information, including where to place your acoustic panels. […]
Our living room ceiling is 21′ high, wood floors, granite counters, (kitchen living room combined)…if I make fabric covered acoustic panels, can I do some decorative painting with acrylic paint? I’m an artist, and don’t care for the looks of plain or printed fabric..thanks!
Good question, Kathi! You can paint the surface as long as it does not seal the pores in the fabric. A non-permeable surface will be sound reflective (ie not absorptive) at high frequencies. In practice, that limits quite a lot of options. You might try water-colors or something else creative. You are an artist after all! 🙂
Your response brings up a question about fabric. Since we do not want to use products on fabrics used so that the fabric does not become reflective, are there any fabrics that you can recommend that are better at absorption? There are many blends of materials out there…. I was actually thinking about some sort of fleece type material, however, before I do, wanted to get your input.
John, there is a section in this article about selecting the fabric and it goes over what to look for. Basically, you want the fabric to be breathable and permeable so that it is acoustically transparent across the frequency range. A coated fabric or solid vinyl, leather, etc will cause undesirable reflection at high frequencies.
I have a three bedroom apartment with a lot of wood floors. All of us live on such different schedules it’s hard to have exact quiet hours but I want to keep noise levels down for my roommates and my neighbors. Would a few of these panels on each wall of the living room make a decent difference for my roommates in adjacent rooms?
Gabe,
Sorry, no. These panels will change the sound within your practice room, but will not improve the sound insulation between your room and the adjacent space. You will need to increase the Sound Transmission Class (STC) rating of the partition wall, which is no cheap or easy task! That will involve a construction project to rebuild the walls or floor/ceiling with materials and components that provide a higher sound transmission loss performance.
What about just glueing the foam to an artist’s canvas? Then you wouldn’t need to build a wood frame, and is easily wall mountable. you could also wrap it in fabric, and it would have soft edges and be much lighter.
Thomas,
Yes, these are all good options. There are many creative ways to achieve the acoustic goals here. With the “artist canvas” make sure that the canvas is permeable as described in the article or it will be reflective at the higher frequency range.
I have just completed construction of my HT room and have 2 packages of Rokul Safe and sound left over. The batts are 4″ thick, if I cut them in half would they be acceptable as material for acoustic panels or should I buy another material? At 4″ would they work? Just looking at options to use what I already have.
Chris,
4″ Batt should be very absorptive. See if the publish sound absorption coefficients for it. The problem is that it will be hard to work with since it does not hold its shape like the more rigid panels do. If you build a good frame for it, it should work ok. The panels I used were not very expensive and they still look good today. Before proceeding, check with a local insulation supplier to see if you can get the more dense panels for a reasonable price.
Hello. I am co-leader of a troop of very energetic and sometimes loud Girl Scouts. Our meeting space is a conference room that shares a wall and a door into our community library. Not a great combination! Our troop will be learning about air quality, air pollution and noise pollution this year, and we will need to create a community Take Action Project to earn our journey badges.
So, I’m wondering if building acoustic panels such as these would help deaden the sound between our conference room and the library. If so, would we install them inside the room we meet, or on the library side of the wall we share?
Thanks for your help!
Nina Gilliam
Co-leader, Girl Scout Troop 17480
Chaska, MN
Hello!
So I am thinking of making a panel but I want to make it more decorative. I understand that the fabric has to let sound waves through it. So logically, if you paint on top of the fabric the sound waves will not travel through and it would negate the purpose?
What about layering fabrics over each other and sewing a design onto it? Would having more than one layer of fabric make them less useful for absorbing sound waves?
As stated in the article, the fabric has to be permeable to sound. A good way to check is to exhale through the fabric and ensure air flows through. Painting the fabric will reduce performance at higher frequencies and is not recommended.
Hey, first of all great advice.
Sorry if this is a stupid question or has been answered… but is it completely necessary to build a wooden frame?
The frame only serves a visual function by holding the fabric tight and giving a perfect rectangular shape. If you do not use a frame, it will look “loose” and will not be as strong. Many commercial panels use a resin hardened edge instead of a frame. I tried to do this for this project but it was much easier to build the frame.
We have diesel motor noises from a factory that is nearby our house. Would this solution help reduce the amount of noise pollution from the engine noises? They are a deep rumble, sometimes even seem to vibrate the house a bit. Would this provide any sound reduction?
Thanks!
Andrew, As stated in the article, these panels are not a noise control treatment. They are intended to improve sound quality for amplified audio sources within a room. From what you describe, your neighbor may be in violation of local noise ordinances. I would start there. This will likely be a costly renovation for you with heavy window glazings. Low frequency noise is hard to control!
You have explain it very nicely. I will surely follow your tips for making a soundproof room. Keep sharing your blog with more updates. It’s very interesting to read.
I just built a few of these panels for my dedicated theater room. It seems the glue (spray adhesive) doesn’t hold the Roxul in place and now that my panels are all done, the Roxul is pushing out the back under the tension of the fabric. My fabric has begun to wrinkle and lose it tautness. Anybody else experience this? I was thinking some sort of “L” bracket on the frame but that will require taking the panels apart which doesn’t sound like a good time. Any thoughts?
Thanks for the feedback. I didn’t get this with mine, but I can see how that could happen if you don’t get a good adhesion on the side. Let me know if you figure out a solution. I think you also may not have made the frames tight enough to the insulation. It should compress a bit when you screw them together. I will add a note about this to the article.
Great thread – I just inserted 3 sheets into my window frame-box to block my bedroom window due to the neighbors new dog that barks ALL night (cheaper than a new window). Works WAY better than the 3″ foam or eggcrating that I tried!….
HOWEVER, I didn’t bother covering the Corning 703 rigid panels with anything, and now I’m wondering if the tiny fibers are floating in the air for me and my spouse to inhale all night long… should they be covered for health safety? I DID have lots of fibers stuck in my hands after installation, so should I be worried about my lungs/eyes/other body parts?
Hope you answer, as it will be quite a job to undo installation and reinstall, but I will gladly do so if necessary for our health saftey. Thank you in advance!
Monica,
The panels work well as a treatment to reduce reverberation, echoes and sound reflections within a room. They are not very effective at improving the sound transmission loss of a wall, however. That would likely require a construction project whereby you add mass, insulation, and sound isolation elements to the wall structure. Google this: “How to improve STC rating of a wall.” Oh, and yes, glass fiber insulation is an irritant, so you should definitely cover those panels with fabric and use gloves and a mask when handling insulation.
Hello Eric,
Thanks for a great article, and awesome directions for a DIY absorption panel. And answering questions for 5 years! Hopefully you can answer mine. I’m building a 4’x4′ vocal booth constructed of 3/4″ mdf about 6’8″ tall, with a solid core door that has a 21×24″ cutout for a slightly angled double paned glass. On the inside, there are no parallel walls, my buddy has designed the booth with 2 additional slightly angled interior walls. I would upload the pic if I knew how!
I have read that a small room can sound bad if not treated correctly, maybe the “chest hump” sound described, although I don’t know what that means. Also described as boxy. I am hoping to avoid this effect. I once tried recording in a 18 gal storage container lined with egg crate that was sprayed with adhesive. My buddy who is a pro at VO since 2001 said the audio sounded squashed. I have a pic of that aforementioned contraption as well. So, all that being said, I was thinking of two walls having DIY PANELS, (maybe 8 columns measured 6″ x 48″ with 4 per wall), and the other 2 walls covered with acoustic wedge foam tile like Auralux, and maybe on the ceiling as well. Do you think this layout might work in getting a clear vocal sound? Maybe some corner bass traps too?
Thanks for your expertise and opinions! Take care.
Johnny G
Johnny,
Thanks, I try to help. The issue you have experienced in vocal booths is caused by two factors. First, the small, square booth will exhibit modal resonances in the lower mid range, right in the fundamental of a male voice (125 Hz to 250 Hz). Second, many of the absorption materials people use to treat their vocal booth are not effective in that range. Try to find a product or material that provides an absorption coefficient of 0.5 or better at 125 Hz, rising with frequency above that. The effectiveness of a porous absorber is a function of its thickness, density, and positioning. My recommendation is to treat the interior walls of your booth with fabric-wrapped, 6 pcf, 2.0 inch thick, fiberglass board and install these on 1.0 inch deep furring strips. The furring should add airspace of approximately 1.0 inch between the fiberglass and the wall. For the ceiling, I would recommend an NRC 1.00 ceiling tile suspended 400mm from the true ceiling, batt insulation in the cavity above, and foam wedge panels adhered to the under surface (visible). This would be the cheap and effective way to get where you want to go.
I noticed you didn’t specify to use a fabric with fire resistance. I’ve been told that could be problematic. Please, if I have been told wrong let me know. The only reason I haven’t done this yet it because I don’t want fire resistant material hanging in my house. Sounds weird, but it is unnatural and a health hazard.
Shane,
Yes, that is a very good point. I should note that flammability is a concern in the article. There was a famous nightclub fire where the acoustic treatment caught on fire. Remember that natural does not mean safe.
Hello,
I recently constructed 12 absorption panels in your method for my basement’s trumpet practice room. Roxul’s rockboard material isn’t easily available in Georgia, so after looking at the acoustical data, I decided to use Roxul’s “Safe-n-Sound” batt material. It worked very well and was available at my local Lowes; $46 for twelve panels of 3″Tx16″Wx47″H batts. I modified the dimensions of the box to suit, and used 3″ furring strips.
The material works very well acoustically and sits within the panels nicely. While it is not rigid, it does have enough mechanical integrity to stay in shape within the frames, and has turned the ear-splitting echo chamber in to a very comfortable practice space.
Thank your for your tutorial!
Aaron
Hi, I’m planning to try this out for myself, the thing is I had already purchased some Acoustic Insulation (Rockwool RWA45) a little while ago, so i’m just wondering if the one i’ve got is good enough for me to use.
Here’s the link: https://www.amazon.co.uk/gp/product/B01N2JC4L6
I did some research and the thickness is 50mm/1.97 Inches and the density is 45KG/2.80 lbs.
Would this Insulation be acoustically good for lower frequencies?
Thanks for the help!
Louis,
It looks like that is about 3pcf insulation. It should be ok as long as there is no seal, coating or impermeable facing on the surface. See if they can provide 6 PCF if possible, since that will perform a little better in the low end.
Hi, thanks for the excellent instructions and recommendations for materials. Very helpful!
I am trying to help a friend to make a concrete block room less “noisy”. It is approximately 30′ x 30′ with a 16 foot high ceiling. All walls are concrete block and the floor is poured concrete. We want to make this room into a general purpose room for “Creatives”. Small music groups, practice room for dancers, teaching room, meeting room, etc. Right now the rooms is just too “live”.
In the comments, I saw that 25% to 35% wall coverage should be sufficient for conversational use.
My question is, how high up the walls would I need to place panels? Would it likely work to just place panels on the lower 8 to 10 feet of the walls?
Hello Mike,
Sorry for the delayed response. You will need to add enough sound absorption to get the decay time down to about 1.0 seconds. Here is an RT calculator that can help. http://www.sengpielaudio.com/calculator-RT60.htm If it sounds complicated, it is.
Since this isn’t really a critical listening space, I think your approach would be fine. 25% to 30% coverage should help considerably and you will see a gradual improvement as you add the panels. There is an art and a science to placing the panels and it changes based on the use of the room. Locating the panels closer to the sound sources can expose them to more sound pressure level. Also, distributing them throughout the room increases their effective absorption. I would distribute them evenly throughout the room and elevate them to about 8 ft just to protect them from hands, etc. There is also likely to be a lot of “flutter echo” between your parallel walls with the high ceilings. So, distributed placement on the upper walls would help with that too.
Thanks for a great article, and awesome directions for a DIY absorption panel. And answering questions for 5 years! Hopefully you can answer mine
and I’m currently in the process of buying a home and plan to make one of the bedrooms my music room
Really cool article I just completed a Bass Trap DIY project and have a bunch of the Roxul Safe and Sound left over cut in various sizes but about a full bags worth. Anyways; I am thinking about using the remaining to build as many of these as I can I used Burlap for the bass traps but want to use the fabric you used and its on sale 50% now for online orders. does any of the Keepsake Calico fabric work or are they all different acoustically
Andre, as long as the fabric is permeable (allows airflow) then it will work for the application.
Hi Eric,
We recently moved into a new home and find a lot of noise, made primarily by our young children banging toys, etc, travels and echos into the upper level through the entryway, as it is open to the second level. I was thinking (hoping) that some number of these mounted on the upper walls of the entryway might improve this issue.
Thanks!
Mark,
I am sorry to say, but they will only have a minimal effect. This is a sound quality treatment more than it is a noise control treatment. Adding sound absorption can make the sound a little less intrusive and a little more distant, however.
I wasn’t able to find locally any of the insulation you mentioned in this article. Most places online wanted a very high amount to ship it. Would this insulation R-Tech 2 in. x 4 ft. x 8 ft. R-7.7 Rigid Foam Insulation work? I can removed the facing off of one side? Thanks so much for your time.
No, I would not use the rigid foam. Absorption performance is not very good for that type of material. A dense soft, porous foam can work, but it is expensive. In a pinch you could use standard 3.5 inch mineral fiber insulation packed into a 3.5 inch deep wood frame.
Hey you guys.
Thank you for a fantastic article. I just made a six pack of these for my 15’ x 15’ x 8’ game/movie/music room and the results were amazing. I can now hear every speaker in my 7.1 AV system distinctly. I use one panel as a bass trap on the subwoofer and there is no longer muddiness in the sound. I listen to music I’ve been listening to for almost 50 years and hear new things I’ve never heard before. And it was a really fun build. I would recommend spending $80 at Harbor freight tools for a small compressor and stapler/nailer. It is much easier on your hands and goes much faster. Also I’d recommend against using burlap which I used for four of the panels. It has an appealing texture and blond or black color but can be difficult to make professional looking corners.
You guys taught me so much and dramatically increased my enjoyment of sound and music. A thousand thanks.
Joe
Hello,
Thanks for the wonderful and detailed article.
My house is next to a busy street and whole day (and night) we have to bear high noise, as both my bedrooms are on street side and have 5 feet by 7 feet glass windows with sliding glass panels. Each sliding glass panel covers half the window i.e. it is of the size of 5 feet height * 3.5 feet width and they slide left to right.
Day time noise is fine, as we are busy with work. But night time noise is a problem. Will it be the right approach for us to use these acoustic panels in additional sliding frames (in parallel to existing sliding glass windows) to prevent street noise from coming in at night? We are good to have half of the window get blocked by the solid panels during day time, as other half will suffice for sunlight. Night time we’ll slide both the panels to cover the whole window.
Please let me know, and thanks again for the detailed article
Just to add to my previous question, I am looking to block vehicle horns and automobile noise of the passing by vehicles. I suppose those audio ranges from 70 decibels (dB) to 120 dB.
Thanks
Hello Seth. The treatment I describe in the article is not intended to improve sound transmission loss of a window. It is to reduce reverberation and sound reflections within the room it is installed. Check out my explanation of the difference between sound absorption and sound transmission loss here: http://acousticsfreq.com/sound-absorption-vs-sound-transmission-loss/ Unfortunately there will not be a simple lightweight drapery that can act as a sufficient sound barrier. Impermeable mass (weight) is the fundamental property of sound transmission loss. I have also provided a list of noise control products here: http://acousticsfreq.com/noise-control-products/
Hello Seth. The treatment I describe in the article is not intended to improve sound transmission loss of a window. It is to reduce reverberation and sound reflections within the room it is installed. Check out my explanation of the difference between sound absorption and sound transmission loss here: http://acousticsfreq.com/sound-absorption-vs-sound-transmission-loss/ Unfortunately there will not be a simple lightweight drapery that can act as a sufficient sound barrier. Impermeable mass (weight) is the fundamental property of sound transmission loss. I have also provided a list of noise control products here: http://acousticsfreq.com/noise-control-products/
Just to add to my previous question, I am looking to block vehicle horns and automobile noise of the passing by vehicles. I suppose those audio ranges from 70 decibels (dB) to 120 dB.
Thanks
This is not about acoustics for a home theater ( wish it was)!
I have 2 solid non moving windows with jalosys at the bottom in my bedroom. What is the best material to put in the window part only?
I’m hoping there is a solid foam type board I can cut and pop into place!??
I’ve already got 3 layers of room darkening curtains, but I really want to sound proof the windows.
Being in Hawaii, I only use the a/ c when its humid ( july- October) the breeze coming in is perfect with my fans.
I welcome and very much appreciate any and all comments/ help/ information!!!!
Hello Michelle The treatment I describe in the article is not intended to improve the sound transmission loss of a window. It is to reduce reverberation and sound reflections within the room it is installed. Check out my explanation of the difference between sound absorption and sound transmission loss here: http://acousticsfreq.com/sound-absorption-vs-sound-transmission-loss/ Unfortunately there will not be a simple lightweight drapery that can act as a sufficient sound barrier. Impermeable mass (weight) is the fundamental property of sound transmission loss. I have also provided a list of noise control products here: http://acousticsfreq.com/noise-control-products/
[…] A simple way to create acoustic panels is to purchase dense fiberglass board insulation that’s at least two inches thick, build a wooden border for it, cover it in fabric, and mount those pieces on the wall. See a full tutorial for this on Acoustic Freqs. […]
Apologies if this has already been discussed, but I’m curious as to if there is any issue with the full panels hanging from the ceiling. I just framed out my first 4 (of 12) with the 8lb rockboard and am planning on using 2 as clouds, and 1 for an angled hang on ceiling/wall. Does the adhesive and positive tension from the frame keep the insulation in place well enough or have you noticed any sagging that puts stress on your cloth? I wonder if the ones that will be hanging at any degree other than 90 should have any additional reinforcement.
By the way, thanks for the article – this is an excellent alternative to ALL of the pre-made panels I was browsing to treat my room.
Mine hung just fine from the ceiling. The fabric holds the insulation in place. Make sure you are using insulation board with enough density that it stays semi rigid or rigid. This is described in the article.
Hello,
I am building an isolation booth. I have heard that using these acoustic panels is more effective than using foam wedges, like Auralex. But my real question is, if I’m making a booth similar to the IsoVox2, which is more like a step-in booth, is it safe to use fiber glass? If it is a small space that you intended to spend quite a bit of time standing in, is it potentially bad for your respiratory system? Thank you.
The fiberglass panels can outperform lightweight foam at lower frequencies, dont know the answer to the health qustion. It is something worth looking into. In my experience the fabric does a good job of encapsulating any fibers. You may also want to use a formaldehyde free insulation board. Also check on the flammability of the foam.
Hi there from Canada! I’m looking at putting together some panels to help stop reflections from drums.. for recording purposes.
I really want to deaden the room so I can add reverb later to sculpture my room sound.
Would this be an appropriate product to use? https://www.homedepot.ca/en/home/p.comfortboard-80.1000737930.html
Appreciate your help!
Thanks.
I’m in a country where the traditional fiberglass materials are not available. Can foam rubber be used in the same way? I have access to sheets of that material – used here for making mattresses and couch cushions.
Ted, There are certain types of foams that can work well. You will need something that is tested according to ASTM C423 or ISO 354 and shows decent absorption coefficients across the audio range.
I just noticed that the photo of the ROXUL product posted is not Rockboard 80. It is a different product that is used mainly for high temp applications. Rockboard 80 part number is RXL 80. You can confirm this by looking at the absorption coefficient tables in the link that is listed. Having said that, according to the table, there is not much difference between the two and, in fact, RHT 80 outperforms RXL 80, although it is no targeted for audio applications and is a lighter density product. Any comments and observations that you might have on this will be very useful.
Alex,
Yes, the product I originally used is not currently available. However, any 3-7pcf unfaced insulation board will do the job. 6-7 pcf is marginally better at lower at lower frequencies.
Just to clarify – if we’re looking to absorb voices, where your instructions call for 2″ of insulation, we would substitute 1″, and update the frame size accordingly?
Yes, for un-amplified human voices in a large gathering space, 1″ absorber thickness is typically sufficient. However, if the room is mostly concrete or stone walls, then you may want to consider 2″ thickness since there is probably not a lot of low-frequency absorption from the walls.
What did you use to float the ceiling panels? The same D rings??
Yeah, I anchored D-rings to the ceiling, then screwed hooks to the back of each panel.
Could you actually suspend these from the ceiling with wire? Also, good toy insert can lights, etc into the boards?
Yes, I installed a few on the ceiling. Just make sure the mounting can hold it! I recommend using drywall anchors or screwing to studs.
I have frequently seen reforms to avoid square corners, the opposite of what builders want. Would you recommend hang some of these across corners, maybe even at the wall-wall-ceiling junction? This seems obvious, which gives pause even if “the solution is intuitive to the casual observer” (which I’ve always thought meant “the author is too lazy to do the math”).
Corner reflectors are especially effective at returning energy, be it radio or light or sound. Would this be the best place to start the installation? Or should the starting place be the centers of each wall?
Mounting in the corners can enhance the low-frequency absorption for a few reasons. It effectively adds a deep airspace behind the panel and the corners tend to have higher SPL, which exposes more energy to the absorption. So, corners would be a great place to install these! I also have another page on this site that helps to find first-order reflections based on your loudspeaker and listener positions.
Great tutorial. I’m a little concerned about the weight of the panels. I was able to source Roxul Rockboard 60 which I imagine is lighter than the 80. Do you remember the final weight of each panel after being framed?
I don’t remember the weight exact weight, but I did not find it to be too much for the installation.
And a follow up to my last question, did you mount to the wall studs, or just into drywall?
You will have to find a mounting solution that can take the weight of the panel. I used heavy-duty picture hangers, but there are many options.
Hi, I just built 3 frames but they are 5 feet tall by 3 feet wide, I had to add 3 pieces of rockwool, 2 vertical and once horizontal on the bottom to cover the entire inner surface of each frame. When I tried to hang them I rested them on the wall and noticed they started to get a pouch or belly on the bottom. The frame is 3inch deep and so it’s the rockwool panel. Did I make a mistake by making the frames too big? My intention was to cover a huge wall in the dining room area where there is a lot of echo. Any ideas of how I can make the Rockwood stay in place? I did not use any spray adhesive maybe that could help? I’m at a wits’ end. I’ve had so many problems building g these things and I just wanna hang them and be done with them
Thank you for this very helpful article. I am about to have re-upholstered (18) 48x96x2 panels for my church hall. My question is whether spray adhesive could be used on the front surface of the panels to hold the fabric flat. Would it affect the acoustic absorption? The current panels seem to have been originally upholstered this way, with glue on all sides, including the front. There is no wooden frame to hold the fabric flat and at this point it is not possible to construct one. Should I direct the upholster to just remove the old fabric (seems to peel off relatively easily) and try to tighten the new fabric on by just gluing the back and the 2″ edges? I would appreciate your feedback.
If the adhesive is applied to thick, then it could cause high frequency reflection. I would try to only apply it to the sides and back if possible. If you do think it is necessary on the front only apply a very small amount for “tack.”
Hi,
Some studies indicate that Rockwool of 6lbs per cubic foot is good for low frequency sound absorbtion (like a bass trap), and that about 3-4lbs per cubic foot it ideal for mid to high sound frequencies.
Im working on reducing the noise in my restaurant and a bar (both separate). We plan to install the Sound absorbers onto the ceiling (open ceiling). The sounds reflections that we want to reduce/absorb are as follows.
Restaurant: Voices, people chatter
Bar: Voices, people chatter, music from speakers, and AC fans.
What density of Rockwool would you recommend?
Thanks!
6-7 PCF is optimal and will provide slightly better absorption in the lower frequencies. 3-4 PCF is cheaper, and that is the only real benefit, in my experience.
Hi – I am going to try this build, but want to cover the panels with images. I have found places on-line that will print digital image on light-weight fabrics (e.g. Spoonflower). But I am having trouble getting free or low-cost high-resolution images. I want to do a triptych splitting one image over three frames. Has anyone done similar or have an image source? Thanks!
Make sure the fabric remains permeable to air after the image is applied.
I would like to echo proof a large church hall (not the actual church), and I don’t have much experience with this type of project. It’s a charity project and needs to be very cost effective. The hall has a flat ceiling and one side has lots of windows. What would be the best materials I could use if I follow your instructions? Any guidance would be very much appreciated.
Thanks for the article. I’m wondering about the exposed rockwool on the back side if the panel. We are looking to make a bunch of these for a church. Some DIY sites suggest stapling screen door fabric across the back. Any concerns on that uncovered rockwool going airborn over time?
That might be a good precaution. Most commercially available panels will have exposed fiberglass on the back of the panel, however.
Thank you so much for this post. So incredibly detailed and helpful! I built three panels today for a session in our new home studio and I was impressed with how successful I was, having no idea what I was doing other than following your steps. Thank you!!!
The density thing — I cannot find any evidence behind the audiophile echo chamber to support it mattering as much as thickness.
6pcf at 1″ will not beat out 1.5 pcf at 4. In fact, 1.5 pcf at 4 blows it away.
http://www.bobgolds.com/AbsorptionCoefficients.htm
Yes, I agree that thickness is the primary consideration and density is secondary.
Hi,
I’m trying to cut out the echoes in a home theater.
Is Roxul ComfortBoard 80 – 1.5” ok for thes. I’m using 1×4 wood.
Thanks!
I recommend using a 2″ or thicker variation, but that should be satisfactory.
Hi,
thanks for a very informative article. I need to soundproof my son’s room who has autism and can be very loud. I apologize if this has already been discussed but I can’t find Rockwool Rockboard in 60 or 80 in our city. However, I can find Ultratouch denim R 19 in 5.5 inches or R 13 in 3.5 inches thickness. It seems to have an STC rank close to Roxul Rockboard and a higher NRC. Also, my son tends to mouth objects so I am worried about using fiberglass or Rockboard. I need to minimize the sound in the home. Can I use ultratouch denim. Also, the one readily available is around 15 inches. Can I use two of these to make a 30 inch panel or having a joint/gap may diminish the panel’s effectiveness. Would greatly appreciate a response. Thanks.
[…] you get from your system. Some of these do not require expensive materials. A great example is creating acoustic panels around the walls. These absorb the sound so that it doesn’t bounce back as an echo. Some […]
[…] days? Well, we don’t recommend baking more of it to use as sound absorbent material, but this How To Build Your Own Acoustic Panels tutorial may be worth sacrificing a few hours of Netflix […]
Hi,
My room has a hard tiles floor. What’s the cheapest option to acoustically treat it? Do I really need to cover the whole floor with a carpet
This is very interesting. I used this in my 4th grade class. We are trying to soundproof our cafeteria because it hurts our ears. We are trying to write a grant so we can buy/make these. Thank you for the informational article.
Hi, I just built 3 frames but they are 5 feet tall by 3 feet wide, I had to add 3 pieces of rockwool, 2 vertical and once horizontal on the bottom to cover the entire inner surface of each frame. When I tried to hang them I rested them on the wall and noticed they started to get a pouch or belly on the bottom. The frame is 3inch deep and so it’s the rockwool panel. Did I make a mistake by making the frames too big? My intention was to cover a huge wall in the dining room area where there is a lot of echo. Any ideas of how I can make the Rockwood stay in place? I did not use any spray adhesive maybe that could help? I’m at a wits’ end. I’ve had so many problems building g these things and I just wanna hang them and be done with them
One of the best articles I’ve seen so far. Thanks!