Where to Place Acoustic Treatment in a Home Theater
Locate specular reflection points with a mirror and a friend
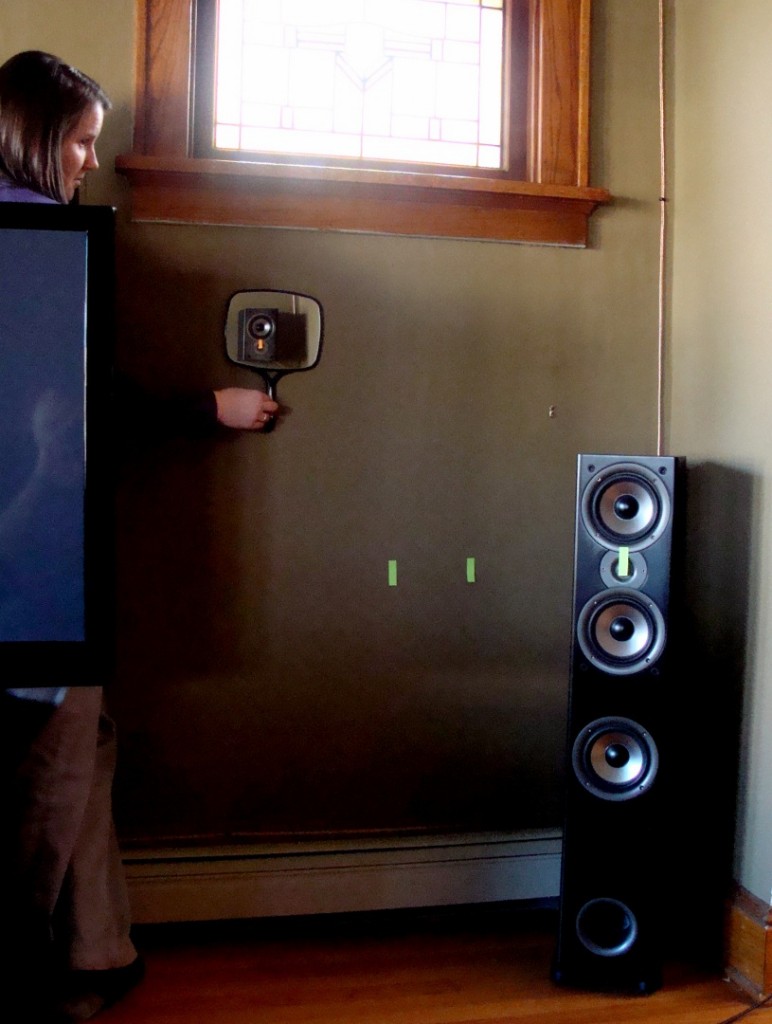 Once you have carefully placed your 5.1 surround sound loudspeakers, video display, and prime listening position seating (see my article here for tips), you are ready to consider acoustic treatment for your home cinema.
Acoustically, a home theater is considered a small room (as compared to large auditoriums, concert halls, and churches). Sound behaves much differently in a small room. Low frequency (bass) response is characterized by unique modal resonances (wiki) determined by the size and proportion of the rooms length, width, and height. Above a certain range, low-mid to high frequency response is characterized by specular (mirror-like) sound reflections.
It is a common mistake to visualize sound as projecting like a laser in the direction the source points. The style of loudspeaker commonly used in home theater has very low directionality, the bass and mid-range energy disperses in all directions. The acoustic energy reflects off of hard/smooth architectural surfaces like drywall, plaster, masonry, hardwood floors, windows, etc.
These sound wave reflections arrive late in time to the listener, after the direct sound from the loudspeaker, distorting and coloring the audio quality. Even though the reflection is only delayed a fraction of a second , it can cause comb filtering (wiki), or a sense of echo. Sound that continues to bounce around within the space will be perceived as reverberance. All of this serves to degrade the natural clarity, balanced frequency response, stereo imaging, and surround localization cues possible from your sound system.
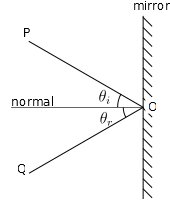
So, how can we stop this echo? Specular reflections (wiki) have the most energy and follow a predictable path from a speaker, off a wall/floor/ceiling surface, and to the listener. Specifically, the angle of incidence equals the angle of reflection. The same geometry applies to the “banking” of a billiard ball on a pool table or the reflection of light off a mirror. This predictability allows us to use a simple trick to find reflection points that require sound absorption treatment. The correct placement of sound absorptive wall panels will effectively eliminate these sound reflections!
What you will need:
1) A large hand-held mirror with flat back
2) 30 Post-it page markers, flags, or notes (5 colors)
3) A -very patient- friend
First, ensure that your 5 speakers (left, right, center & surrounds) and prime listener seats are all in their final position. Changing the location of any of these will also change the reflection points on your walls, floor, and ceiling.
Next, remove all other furniture, decorations, and furnishings from the room; you will need bare walls to do this investigation.
Take one post-it note of each color and place it on a loudspeaker to identify it. Each speaker will need its own color, which will be helpful later in identifying which points correspond to each source.
Sit in your center listening position (sweet spot). I chose to perform this process for two listening positions, one on each end of the couch. But, this effectively doubles the amount of marker points you will make. So, feel free to just sit in the center seat with your head and body as you would have it while watching a movie on your TV.
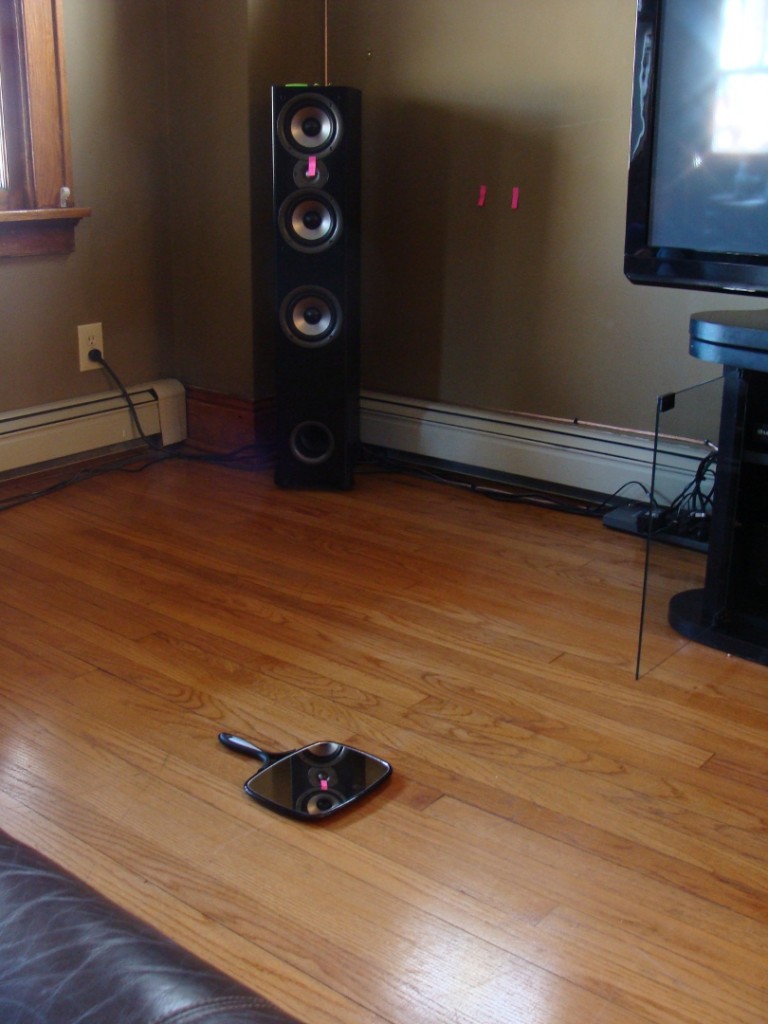
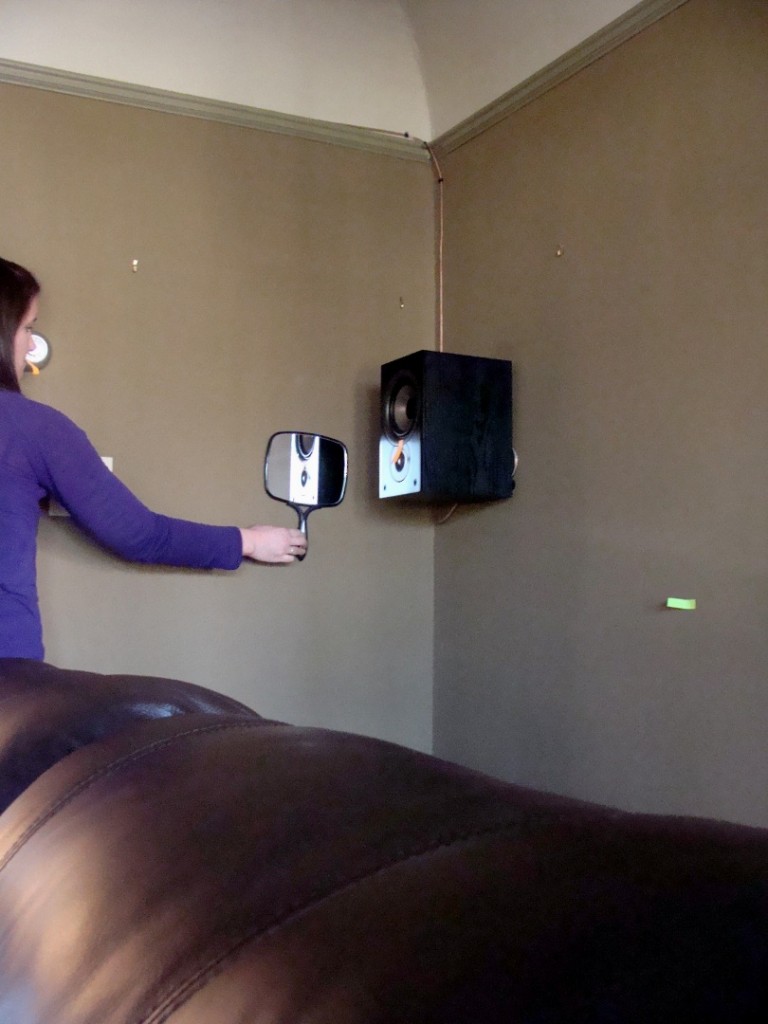
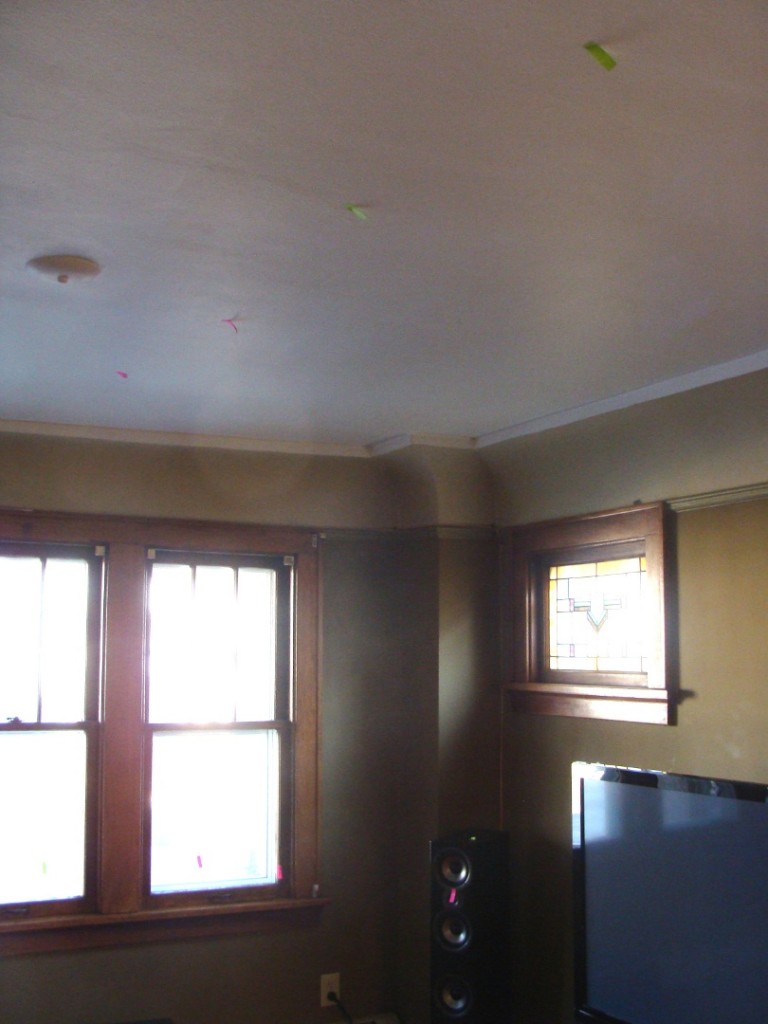
Now, start with one of the side wall surfaces. Have your friend hold the mirror perfectly flat against this wall. It is important that it remain flat and exactly parallel to the wall. Slide the mirror across the wall surface until you find the reflected image of one of the loudspeakers. Mark that position on the wall (under the mirror) with the corresponding color of post-it note. Do not tilt the mirror or move your head to find the image, line the image up to the actual listener position only by moving the mirror parallel to the wall/ceiling/floor.
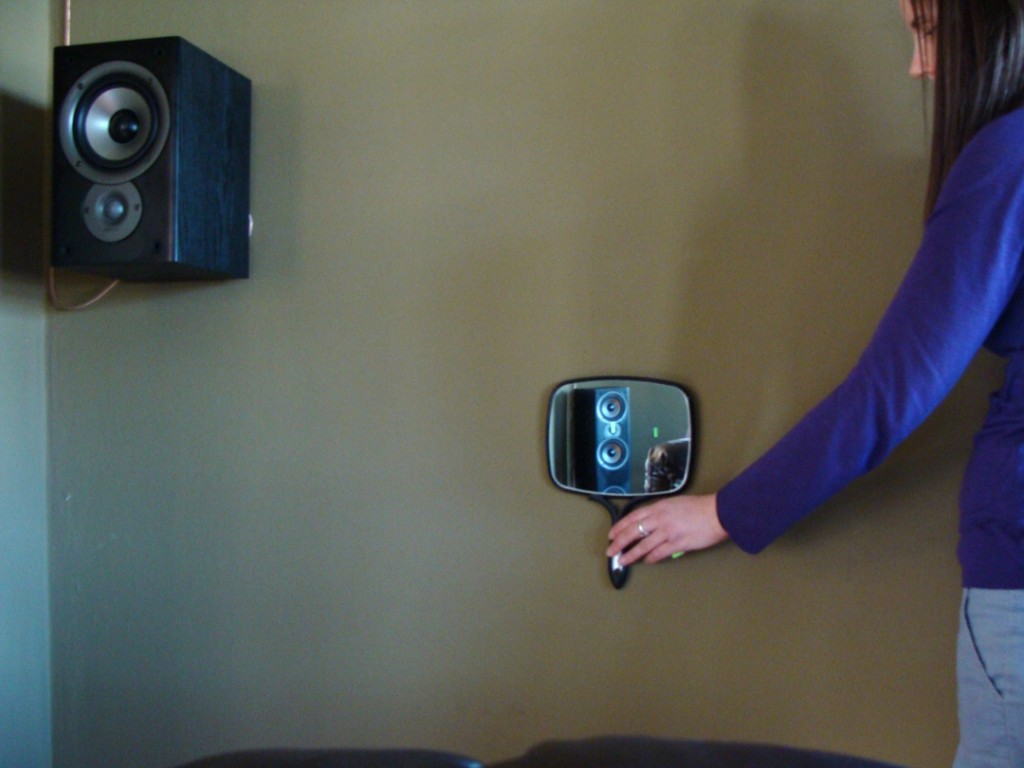
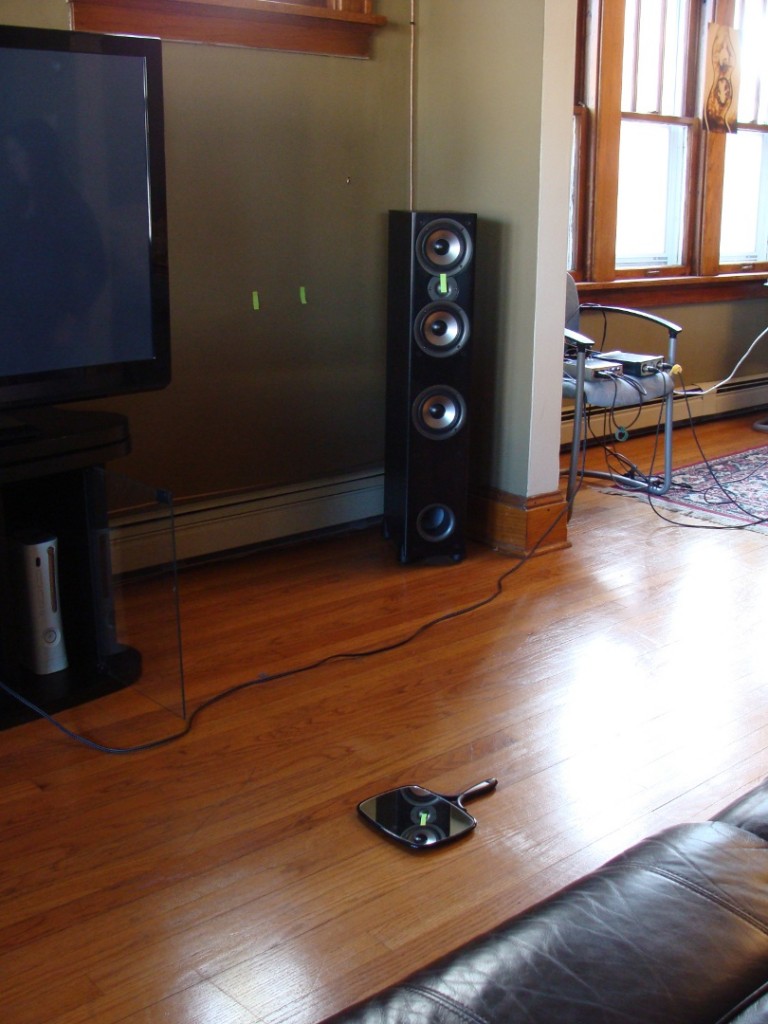
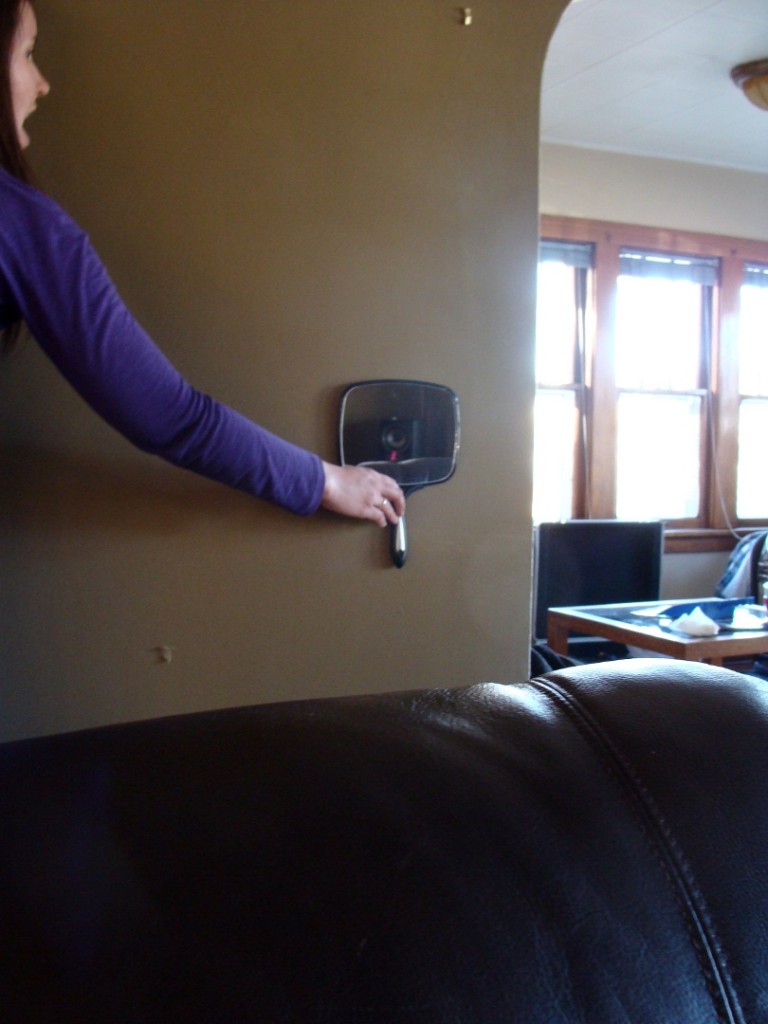
This will be a little tricky at first; you will have to give instructions to your friend to direct the mirror’s movement toward each speaker image. Be nice and patient to them while you both get the hang of it, or switch positions if one job is easier for you. Some reflection images will only show the back or side of the respective speaker, mark these points also. The longer wavelength energy will diffract (wiki) around the back of the loudspeaker and reflect on the wall at this point.
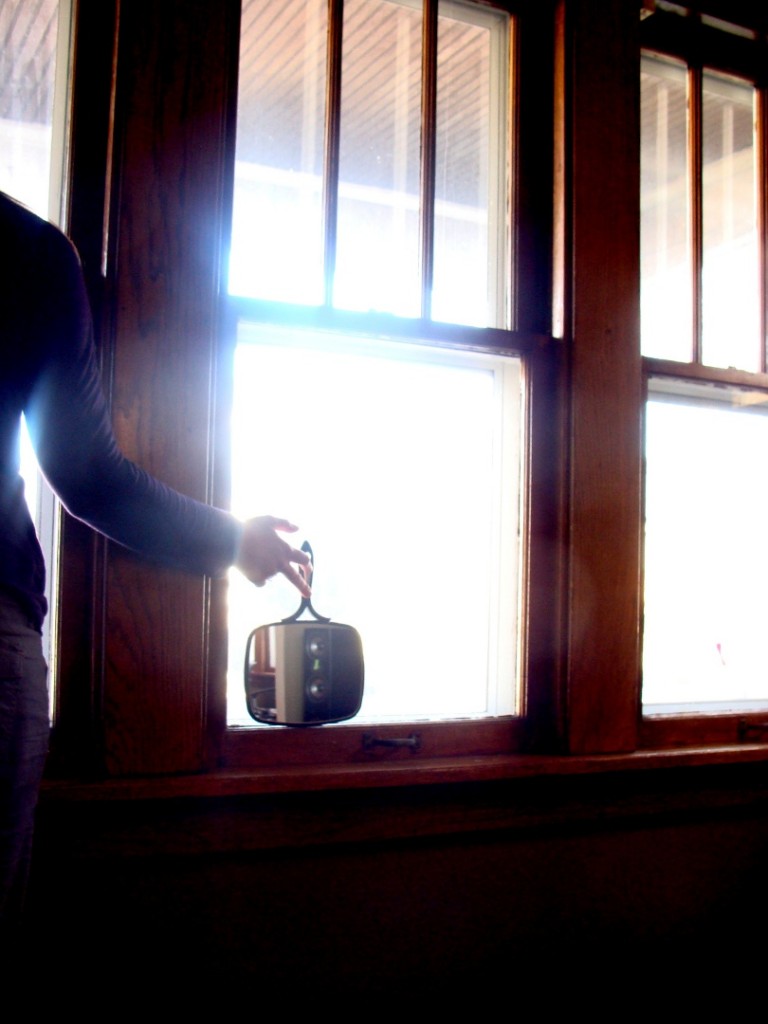
Each of the five speakers (Front-Left, Front-Right, Center, Surround Left, Surround Right) should have an image point on each of the four walls, the floor, and the ceiling. That means you should find 30 specular reflection points in your home theater (5 speakers x (4 walls + 1 floor + 1 ceiling)). Some of the reflection points may be blocked by the tv, light fixtures, open hallways, etc. These probably can not be marked or treated. Reflection points on windows should be marked, however. Don’t forget the ceiling, you’ll probably need a stepladder to reach it!
Once you have marked or accounted for all of the reflection points, you will have to decide what to do with each. The reflection images from the Front-Left and Front-Right speakers are probably the most critical to address since they reproduce music and movie sound effects, followed by the Center channel (speech) and less critical are the Surrounds (ambient and behind listener effects). You will employ sound absorption materials (wiki) to eliminate these reflections.
Different sound absorbing treatments will be necessary depending on the surface material at each reflection point. My recommendations are as follows:
Surface Material Recommended Treatment
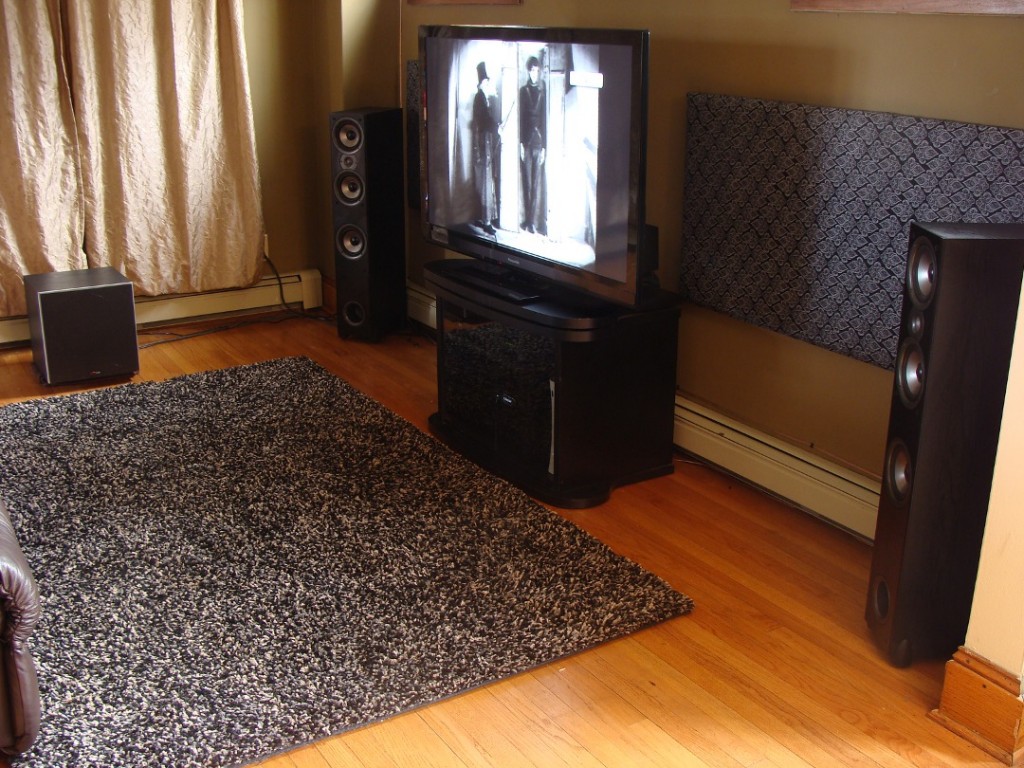
Hard floor (wood, tile)……………Thick rug (shag baby!) with heavy pad underneath
Carpet…………………………………..None
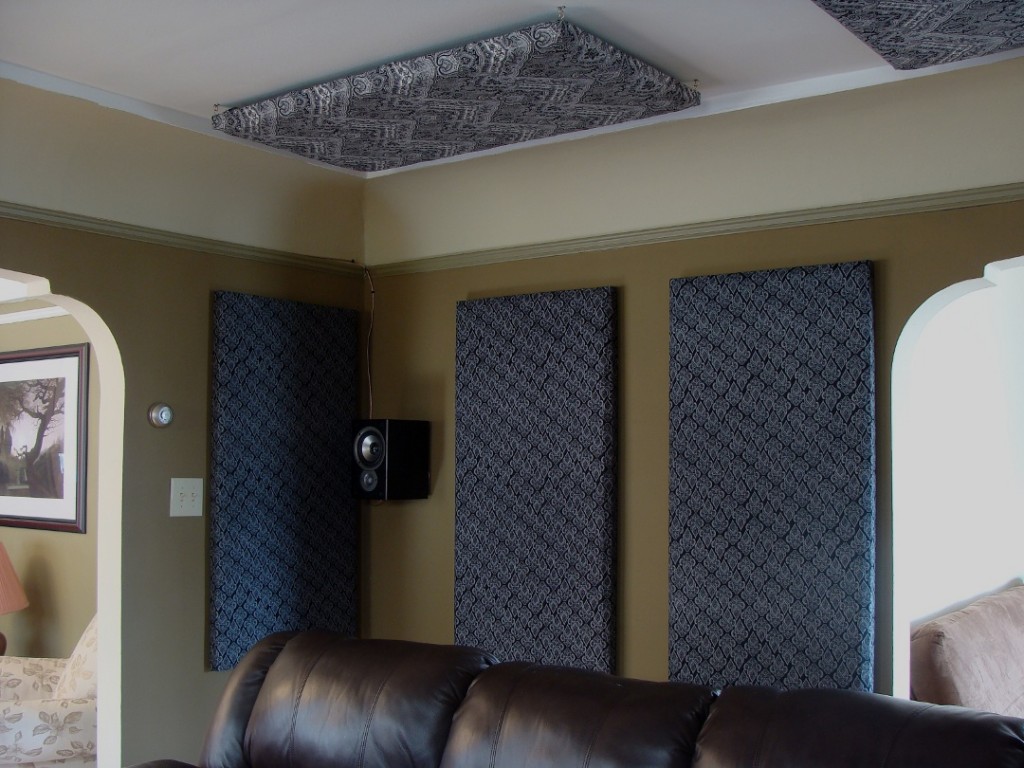
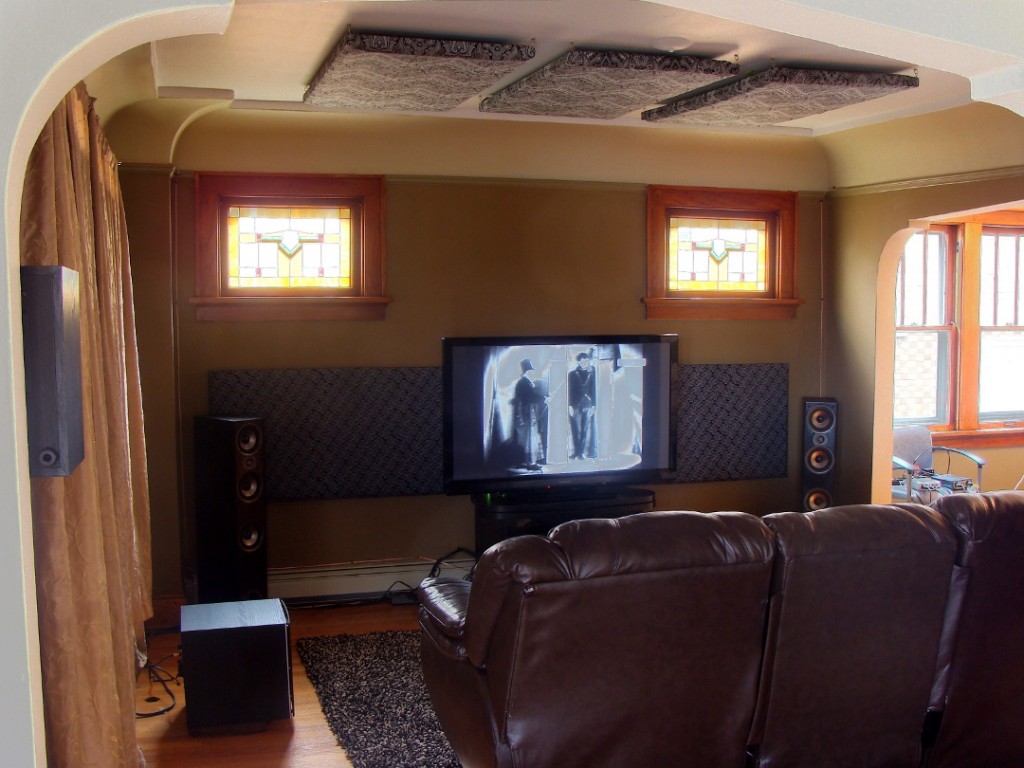
Lightweight Drywall………………2” thick fabric wrapped sound absorption panel (see my article here)
Masonry or Heavy Plaster………4” thick fabric wrapped sound absorption panel (see my article here)
Glass/Windows…………………….Sound absorptive curtain (see my acoustic drapery article here)
Treatment Installation Example Photos:
A big thanks to Kevin Arndt, recording engineer at The Exchange for showing me how to use a mirror to check for slap off a mixing console.
Check out our complete guide to home theater acoustics for more information on loudspeaker placement and DIY sound absorbing materials.


Very clever! I saw this on hackaday.com, read the title of the article, saw the picture of the speaker in the mirror, and immediately had an epiphany. There’s something special about the simple ideas you never would have thought of yourself, but seem so obvious when someone else shows you. I live in a small apartment and worry about stuff like this. I fancy myself an audiophile who just can’t afford to be one yet. Thanks for the excellent tip!
I also found you on hackaday.com. Very cool idea. Could use more lasers though 😉
I have read from these things at the Master Handbook of Acoustics (F.Alton Everest), but never got my self around applying anything. Though this example was so damn clear and straightforward I might even have to try this! 😀 Great and very interesting article to read. Those rock wool panels seem easy enough to build and if I can tell from the pictures that at least the ceiling ones have little gap between panel and surface which increases the absorption also if i remember correctly?
Thanks for the encouragement! Yes, leaving a few inches of airspace behind the panel and/or using a thicker core material will improve the low frequency absorption characteristics. Some internet commenters on a few of the forums have said that a 2″ panel flat to the wall is too thin too be effective, but that that is frankly absurd. The 2″ panel is the bread and butter acoustic treatment and will be perfectly good for most home theater applications; it will yield a HUGE improvement over the existing bare drywall. If we were designing a professional recording studio or commercial theater, we would get a bit more involved, but this article is targeted at people who live in the real world!
Ha ha. Love your idea, but with all the high tech gears & you are watching BW silent movie? Just funny! 😉 Gotta go shopping 1st thing tomorrow! Good job!
Thank you so much for the detailed DIY steps on building the soundboards. We have made many already. One question I have….. Where is the best places to place them if we live in an open ranch style house with a open floor plan- our room is 35×50 with floor to ceiling height of 17 foot. All tile and hard wood except big fluffy rug and your sound boards. Your acoustical article was for home theatres which are generally smaller. Do we need to place them on the ceilings as well? Have four children who are exacerbating the echo, echo, echo…. Any help is appreciated, and thanks again for the detailed DIY steps. I was cringing at the cost of ordering them pre-made.
Hello,
Thanks for the very useful series of articles. Like Kiley I too live in a large, open plan space which is beautiful but noisy. Any advice on the positioning of sound absorption panels in such a space would be much appreciated (on the vaulted ceiling?).
Thanks again.
Hello Jane,
Well, the ceiling would be a good place, or any large flat wall areas. Keep in mind that for a large space like that you will need quite a few of them to make a noticeable reduction in ambient noise levels. Basically, you need to significantly change the ratio of reflective to absorptive surfaces in the space. So, one or two will not cut it. The square foot area you need depends on the cubic air volume and other materials in the space. Acoustical ceiling tile is often used for this purpose, and it typically covers the entire ceiling. Also note that you are only absorbing reflected energy and reverberation, not reducing the sound power produced by your noise sources. I hope this helps,
-Eric
This is a great and extremely simple way to figure out acoustical treatment placement. Anyone can do this and achieve good results.
Great article, many thanks.
Are you moving your head to look at the mirror as your helper moves it, otherwise how do you see the mirror for surround speakers if you’re in your normal listening position and looking forward? Sorry for the silly questions just wanted to make sure as it’s not mentioned explicitly.
Thanks 🙂
Mark,
Thats a good question! Yes, you will have to rotate your head to see behind, but try to keep yourself in the same general position. One important not is to make sure the mirror remains perfectly flat to the wall. Do not tilt the mirror to find the position. I hope this helps! -Eric
Back when only Dolby Pro Logic was around, I had gone to an acoustic class at THX and they had indicated that they wanted a fairly reflective surface in the upper areas of the room in the rear because at that time surround was not 5.1 and they wanted to disperse the surrounds so as not to sound like mono headphones.
Seems like this idea has changed now that that there is 5.1 and 7.1
Am I correct then in saying that we now want to prevent this “liveness” in the surround walls or is there a chance that too much acoustic treatment could deaden the room?
Thanks in advance
Dan,
My opinion would be that if the room were to be used for home theater, then “dead” is the goal. Take a look at professional THX certified movie theaters; all surfaces are treated with sound absorption. This is to completely remove the room from the audio chain. This will provide a more realist soundscape during outdoor scenes, etc. However, for media production studios and music listening rooms some “room sound” or “liveness” can be necessary. Hope this helps!
-Eric
Hi guys, what if you have 2 seated rows, should i add ceiling panels for the second row also ?
Dany, that is optional. I personally would tune the room for a “sweet spot” or two and then let the extra seats “suffer” 🙂 If you want to treat for every location, you will need to repeat the steps for each chair and add markers on the wall for each reflection point. I would color code it so you can make decisions and prioritize the panel layout.
Hello I juat read your article and I have learned a lot. I will be applying all of your tips that you have pointed out but I was wondering about how I can get the best sound from my Atmos speakers that are going to be placed in the ceiling just infront of the seating area.
The plan for my basement is going to be a open concept entertainment room one side will have my screen and projector and behind it is going to be a lounge type area with a dry bar and seating are.
If you have any idea’s on how I could maximize the sound in this whole living space I would be very greatfull.
Best Regards
Great article! Are there any special considerations when using this method to reduce reverb? I’m recording a podcast and without blankets all over the room I get reverb/echo. Floor is hardwood with vaulted ceiling. Since the speaker and the mic are in the same positions, would I just look for the mic in the mirror? Thanks! Chris
Chris, You could use my method to find the first order sound reflections, but you will want to use additional treatments to reduce the overall decay time as well. I have another link on this site which describes how to make sound absorption panels: http://acousticsfreq.com/how-to-build-your-own-acoustic-panels/
See also this excellent resource: http://www.mne.psu.edu/lamancusa/me458/8_rooms.pdf
Love this article; and the fact that you still update it!
My room is very small. Nothing on the walls. A chair facing forward with a window to its right and a closet door to its left. The wall is sheetrock. The floor carpet. The speakers are corner placed (The Horns) and angled facing the chair. I am planning to hang some sound absorbing drapery over the small window and to build the acoustic panels featured in your other post. I think I understand where the side, front and back panels would need to go based on your instructions, but I am unsure about the ones on the ceiling. How did you determine that? Thanks! Cheers
Hello Tim. You can use the same mirror-positioning approach described in this article to place the treatment on the ceiling. It is just a little more awkward; you’ll need a ladder. 🙂
I am attempting to cover the ceiling of a gymnasium with panels that were made using Owens Corning 703 – 2 x 4 panels. The gym is roughly 100 x 75. I have 130 panels that I hope to install. The walls have already been professionally treated with sound panels.
Do you have any recommendation for how I should scatter the new panels on the ceiling, and how much of a gap I should leave between the panels and the ceiling? Any help/guidance would be appreciated. Thanks!
Hello, Andrew. Without knowing much about your unique use case I might recommend distributing the panels relatively equally across the ceiling area throughout the gym. That will provide the most absorption in the room. Adding an airspace behind the panels will help attenuate lower frequencies. The deeper the airspace, the better, up to about 8-10 inches or so from the ceiling. However, even a 1 inch airspace will help.
When placing the acoustic panel in relation to the reflection point(s) I’m treating with that panel, is it more important to center the panel vertically or horizontally?
Good question. I would say horizontally since there is more surface area spanning the vertical axis.
Thank you for your article.
I would appreciate your advice on the following:
I have a small room in the basement which I wish to use as a home theatre room and karaoke room. It is rather echoey hence I wish to both improve the sound when in the room as well as prevent as much sound as going out so as not to disturb others.
-Qn: I will also have a 5.1 for the home theatre along with a 2.0 for the karaoke. Do I follow the above as mentioned and do it twice? Once for the 5.1 system and the second for the 2.0?
– Qn: Lastly, I have no choice but the have seats right up the rear of the wall. Will this adjust panel position?
– Qn: I also thought of using a sounder like Yamaha’s YSP 5600 (to save space) which beams sound to the ceiling and walls to reflect it back down to create a virtual surround sound effect. Will having acoustic panels kill this sound bar?
Thank you so much in advance.
Hello. Thanks for the guide (and much more around the site).
We have a room that’s about 15’w x ‘15.5L x 7.5’h, closed. Have a big 95″w x 58″t window centered behind the TV and center channel, with 15″ subs and tower speakers flanking it. There are currently wood slat blinds (<1/8" thick wood slats) over the window. Would these provide some treatment if left, say, cracked open at an angle? I am sure curtains would be better, but they would be harder to access behind our gear. We have a remote controlled exterior shutter behind the window so want to try to maintain convenient control of light and the view but am concerned the window will mess up the rest of the lightly treated (reflection points) room.
Thanks!
I’d recommend a heavy-weight velour drapery over the window.
What a great site for DIY home theatre building. For Atmos, would you advice any deviation from the above approach or simply do the same trick with the mirror and absorption? I read that sometimes instead of absorption one would need diffusion panels. When/where would you those?
Atmos has so many sources that you might want to apply this method with just the main 5 speakers.